A unique and viable approach to establishing local food self-reliance and building stronger communities.

Showing posts with label Winter. Show all posts

Saturday, February 28, 2026

Seeds of Abundance - early spring garden Links

Good day to you all. Here in the Willamette Valley of Oregon (USDA zone 7b) spring planting has begun! Since we have large hoop-houses, we are able to start some cool-weather-loving crops even in January (see below) but for most folks, even with greenhouses, seed-starting doesn't usually begin until some time in February. This post contains links to info you may find useful in your own gardens at this time of year. Happy spring planting! (Image: Llyn Peabody "Radiance")

Organic solution to slugs: Here in western Oregon, slugs and snails can have a devastating effect on early spring plantings. Interestingly, the native Banana slug is a composter and only eats dead material but several species of non-natives prefer live foods. Iron phosphate is considered safe by organic standards. Effectively, it constipates the gastropods, interrupting their reproductive cycle. To read more:  Organic solution to slugs

Coffee Grounds and Wood Ash for Soil Fertility: At the Sharing Gardens, we have weaned ourselves off commercial fertilizers and other soil amendments. In our search for readily available additives to the composted leaves and grass that make up the majority of our soil's fertility, we have found that wood ash in particular, has really helped to keep our soil's mineral-content high. And, since we heat our home with wood, it's an abundant and free resource. Here's a post about using wood ash (and coffee grounds too).  Coffee Grounds and Wood Ash for Soil Fertility  (Image: Digging in wood-ash to our raised beds)

Why sunflowers are so great for bees: We all know that many species of bees are in trouble; both the imported honey bees and the diverse native varieties. In fact many other pollinating insects are also showing steep declines worldwide. They need all the help they can get! Researchers have found that there is a specific ingredient in sunflower pollen that acts as a boost to bees' immune systems. Growing sunflowers is great for birds too as their seeds come ripe in the fall when birds need to store up on a diet high in protein and fats for migration and winter health. Why sunflowers are so great for bees

Growing Celery from seed: We began growing our own celery many years ago with great success. The seeds are extremely slow to germinate but once established, a celery crop can be harvested multiple times (cut and 'come again') This feature extends this highly nutritious food with diverse uses well into the following early spring. The crop we have now (early March) is now on its third harvest and we're still cooking it into soups and juicing it fresh. Growing Celery from seed (Image: Chris and Donn take a celery snack-break mid-summer)

Growing Kale from seed: Kale and collard greens are the two most nutrient-dense foods (per calorie) available! Kale is easy to grow, can be harvested over and over again and fall-crops will often winter-over providing fresh greens during the early spring 'hunger gap' (a traditional term for the time when storage crops may be running low). When kissed by a touch of frost, the plants increase in sweetness and tenderness and, as they begin to flower in their second year, this 'raab' (pronounced "rob") is even more packed with nutrition than the leaves alone! No-Fail Kale: The Powerful Health-Benefits of Kale and How to Grow It (Image: Bella loves kale!) 

Planting techniques we use: Over the years we've developed different techniques for germinating seeds. Here are a few...

Planting seedlings in raised beds (for later transplanting): For crops that can germinate in cool soil, and that transplant easily, such as lettuce, cabbage, kale and beets, this method works very well. We plant dense lines of the seeds directly in our raised beds (see image at right). It's easier to maintain temperature and moisture-levels more consistently than by some other methods. When the seedlings are large enough to transplant well (and before their roots get too entangled or deeply established) we gently tease them out of the bed and transplant them into pots, egg-cartons (see below) or into their permanent growing spaces in other beds. (Note, this only works if you have very loose soil). Planting seedlings in raised beds 

Planting lettuce in egg cartons: Whether we start our lettuce seeds in raised beds (above) or tofu-containers (below) they need an interim planting before they can go into the ground in their permanent spots. Egg cartons work really well for this. They use less soil than plastic 6-packs and, because the egg cartons are biodegradable, the seedlings' roots grow right through them. This makes transplanting them very easy (even for children and inexperienced volunteers) without causing root-damage or transplant shock. Planting lettuce in egg cartons

Starting seedlings in repurposed tofu containers: We try to garden with a minimum of environmental impact so, if we can repurpose things, keeping them out of the waste stream, we're all for it! Being vegetarian, we eat a lot of tofu. For many years, our favorite brand came in plastic tubs (image, right). By drilling holes in the bottom, we can use them to start, and grow-out many varieties of seedlings. The tubs are re-usable and use less soil than small plastic six-packs which extends our use of this precious resource. Starting seedlings in repurposed tofu containers 

Best video on pruning table grapes: Early spring is the time for pruning grapes. For many years we struggled to find a method that was easy to understand and implement, and that had great results. The following post links to a video which is the best, brief explanation for this process that we've found. Best video on pruning table grapes

Why we grow and eat organic food: There's an old saying..."You can pay your farmer or pay your doctor". Eating foods grown without the use of toxic chemicals or genetically engineered seeds just makes sense! But if you need some more evidence-based reasons to increase the amount of organically-grown foods in your diet, this post is jam-packed! Why we grow and eat organic food (Image: all, organically grown at the Sharing Gardens!)

May this spring season be full of abundance and blessings in your life and all those you touch. (Chris and Llyn in front of our first Monroe greenhouse, 2011 - with a spring rainbow)

Abundance through Sharing: Our goal is to teach and demonstrate not only the 'how'  and 'why' of growing healthy food but also to communicate the philosophy that underpins our project. We aim to: 

Follow this LINK to read a brief quote from a Lakota Sioux elder on the importance of 'teaching the children a helping way'.

Tuesday, February 17, 2026

Transplanting Beet Seedlings

A few years ago, we discovered that beet seedlings transplant quite readily. Your nursery soil must be quite loose (so the beet roots don't get damaged when you dig them up) and you need to prep the receiving soil also to minimize transplant shock. This saves seed, and room in the germination process as you only transplant the viable seedlings.

To initially plant the seeds, dig a shallow trench and water thoroughly. The trench assures that future waterings channel the water directly to the seedlings and their roots and they're less likely to dry out between waterings. 

Lay out seeds on the surface of the trench about 3/4" apart and cover them with a light sprinkle of sifted soil and gently push them into the soil so they have good contact. 

Beet seeds in the lower, left foreground. A clear plastic nursery cover placed over them keeps them moist (showing at left of picture). We've used plastic sheet-cake covers too, that we rescued from recycling. If the soil starts to dry out, water gently using a watering can (so the seeds don't float away).

To transplant: once seedlings have leaves that are 2"-3" tall, prepare another shallow, well-watered 'groove' to transplant them into. While the seedlings are still in the nursery, cut the tops off, leaving about 1-2" of greens attached to the root. The cut greens can be eaten in a salad or lightly steamed...Water the roots well before gently prying them out of the nursery soil. We put ours on a tray to carry them to the new transplant site.

If dug up when beet plants are young, they can be successfully transplanted to a new site with great success.

Transplanting is best done on a cool/overcast day to minimize shock. It can also be done in the evening so the beets have a chance to settle in before being subjected to full sun. Make planting-holes with your finger or dowel 4-5" apart. Place a beet root in each hole and gently squeeze soil back around them, even with the level they were in the ground in the nursery bed. 

Water them thoroughly, and water twice a day till they're well established. 

Here, Donn uses a piece of bamboo to make holes for the seedlings. They are planted about 4 inches apart.  

Three rows of beet seedlings shortly after transplanting.

In this picture, Donn is transplanting beets. Llyn, on the right is planting lettuce seedlings. (for more info, see below). 

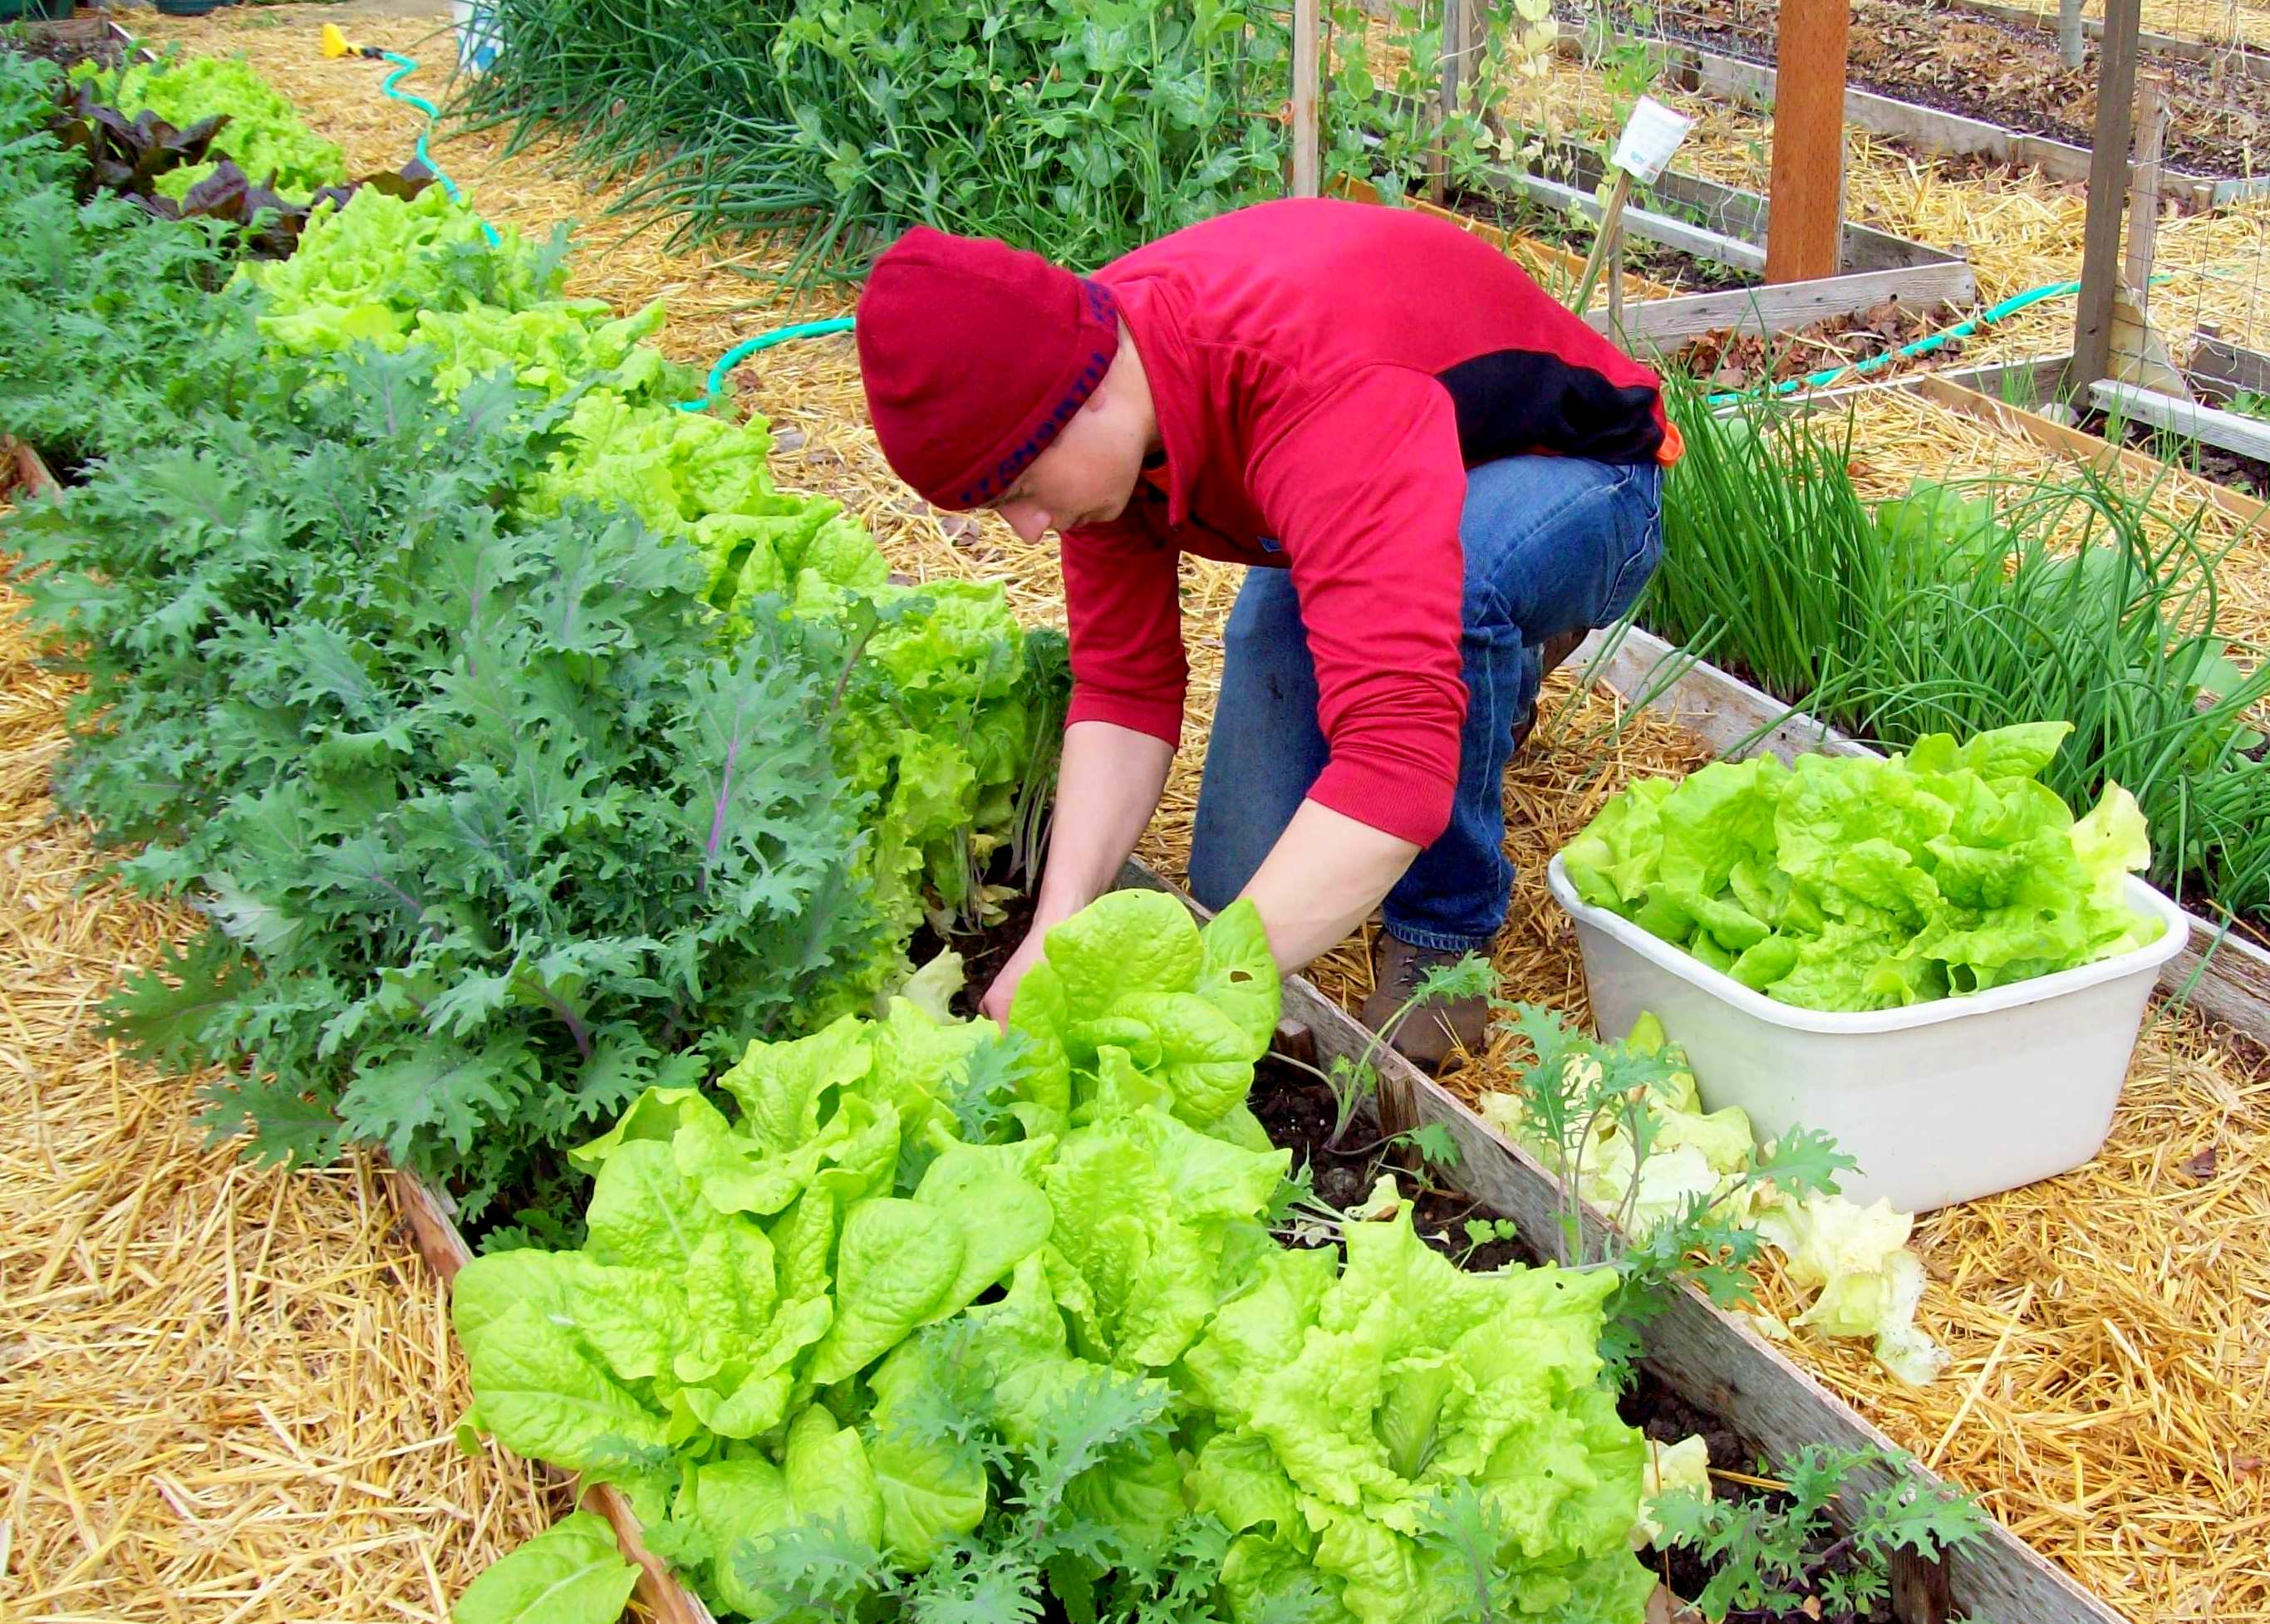
Our current favorite way to grow lettuce seedlings: in egg cartons. Each seedling is torn individually from the carton, including the egg carton cell, seedling and soil. The roots grow right through the egg cartons. Transplanting them this way reduces transplant shock. Each 'cell' is planted 6-8" apart.  When they get big, we harvest every other one so the remaining ones can get even bigger. (Growing Seedlings in Egg Cartons).

Friday, January 9, 2026

Growing lettuce seedlings in Egg Cartons

We often start lettuce plants in egg cartons! The egg cartons use less soil per plant than your typical nursery 'six-packs' and when it's time to transplant the seedlings, we just tear off a cell and plant them directly in their permanent bed; egg carton and all! The roots grow right through and have very little transplant shock. We love that the cartons are biodegradable so we're using less plastic in the gardens. Also, they're free!

Here's a step-by-step post on how we do it.
 
When it's time to plant the 'starts' in the ground, we remove the 'lid' of the egg carton that had become the tray that held the egg carton cells while the lettuce plants were growing. This can be composted. Then we just tear off each cell and plant directly. Roots grow right through! (You can see little, tiny roots coming through the bottom of the egg carton 🙂 ) 
 
We start the seeds in a tofu container with holes drilled in the bottom. We're vegetarian and, as you can see from the picture, we eat A LOT of tofu! Three to five drainage holes is plenty. Holes should be 3/8" - 1/4". (You can make a bunch at once by stacking them and drilling through 10-15 at a time.)

Use finely-sifted potting soil so the seeds don't need to struggle to germinate. Pack it firmly and evenly (with the bottom of another tofu container) so the seeds are started on a flat surface and all come up at the same time. Water the soil. Don't plant too thickly and aim for an even distribution of seeds. This will make it easier to tease them apart and transplant them to the egg cartons later. 

Sprinkle a very light dusting of soil on top and press it down so seeds have good contact with the soil. Put the tofu containers in a tray and water from the bottom (so the moisture 'wicks' up until the first  leaves appear. Watering from the top can make the seeds spread unevenly. Don't over-water! Seeds need very little moisture to get started.

Once seedlings are about two inches tall, tease them apart and replant in the egg cartons, one plant per cell. It is important to handle seedlings by the stem, or leaf. Some of their root-hairs are almost too small to see with the naked eye and are easily damaged. (Pic: cabbage seedlings)
  
Tear the lids off the egg cartons and use them as trays under the egg cells. Strip off any labels with thick ink (they don't allow the water to drain well). Soak the egg cartons in a tub of water so they are saturated. Fill each cell with sifted, moist soil. Your seedlings will experience less shock if transplanted into moist soil. Gently water them in with a watering can or fine spray. Keep them in a shady spot for a few days while they get acclimatized. The egg cartons hold moisture while the plants' roots are developing.

We prefer to use egg cartons with no plastic-y labels or excessive printing which can interfere with proper drainage. Plain, pressed-paper egg cartons are biodegradable and compostable and the roots grow right through.

These seedlings were transplanted a few weeks before this picture was taken. Don't wait too long or the plants' roots will become entangled in the tofu containers and you risk damaging them when you transfer them to the egg cartons. On the other hand, if you try to do it when the seedlings are too small, it's much harder to work with them and their root systems may not yet be established and the plants may dry up and die between waterings.

To minimize the stress on your seedlings, do your 'potting up' in the shade or on an overcast day. Here, Donn and Chris are transplanting cabbage seedlings into tofu containers: six to a pot. Notice Chris is using a pen to make a hole to drop the little seedling into. Use this same method with the egg cartons being sure not to "J"-root the plants...All roots should be covered with soil; none sticking out.

Before planting the seedlings, we make a furrow in the soil and water it thoroughly. This means that the plants are going into wet soil (which makes them very happy) and, with each subsequent watering, the water is channeled towards the roots. 

In the picture above, the black nursery trays (behind the lettuce starts) are covering other recently transplanted lettuce. This shades them to minimize transplant-shock and discourages birds from coming in and helping themselves to spring-time 'salad'. After 4-7 days, we can usually remove the trays without a problem.

Many weeks later...

It's fun to mix colors/types of lettuce...

Lettuce heads are harvested once they reach full size. Here, a Service Learning student harvests Slo-Bolt lettuce for us to share.

Now, that's some beautiful lettuce!

Winter Garden Tips & Inspiration!

Hello dear friends of the Sharing Gardens and welcome to our February Digest with timely "How To" articles on: Growing Peas, Onions, Kale, Milkweeds and other Winter Crops from Seed and Grape Pruning. (Image, left: Llyn Peabody 2020).

And, even if you're not so interested in gardening topics, be sure to scroll to the bottom of this post for links to "An Amazing Synchronicity!" and a short video about the connection between 'sharing' and the 'experience of abundance'. Both are very inspiring and thought-provoking!

The back of our house, workshop, Oz-greenhouse and garden shed.

Here is our latest new post on Starting Early Spring Crops from Seed (lettuce, kale, cabbage etc) (but wait a bit on broccoli and chard because if they're kissed with frost they have a tendency to 'bolt' - got to seed). In it we offer step-by-step instructions using our method of starting seeds in re-purposed tofu-containers with holes drilled in their bottoms (left) inside a grow-tunnel or greenhouse.

We've also been having a lot of success starting seedlings directly in the raised-beds of our greenhouses (left). Read here about our methods.


PEAS:
There's just nothing to compare with the delicious sweetness and crunch of edible-pod peas. Many years ago we discovered a method to get a head-start on pea-planting. Read this post to learn how: Valentines Day - Time for Pea Planting!

ONIONS: Some years we have better success than others in growing onions. With gardening, there are always so many variables so, what works one year, may not work the next! Here are posts that outline the methods that have yielded the best results over many seasons:

Onions - Growing from Seed - Using heat mats and shallow pots

Onions - Growing From Seed - deep pots 

The following article was written in the heart of summer but the first part of the post details onion harvesting and curing so we include it here. Growing Onions from Seed - It takes a Village


Kale is one of the easiest plants to grow in the Pacific NW
; it is hardy through the winter and, if mulched and watered sufficiently can even withstand the hottest parts of the summer. Along with Collards it is the most nutrient-dense food per calorie! Unfortunately, it is also one of the most highly pesticided plants as well. Follow the links below to learn:

Why it is so important to only eat organically grown kale: Kale again in the "Dirty Dozen" - 2024  

Excellent info on the nutritional value of Kale and tips on growing it! "The King of Vegetables; 'Kale' to the Chief!" 

One of the pleasures of growing your own food from seeds is to begin to save your own seeds. With most varieties, it's not difficult and the seeds you save yourself will naturally select/adapt to be more perfectly suited to your local climate and conditions. Saving seeds also contributes to having a greater sense of local food-security in case there ever comes a time when seeds are not distributed over long distances, or there is a seed-crop failure in another part of the country. Read here for more tips on Growing Kale and Saving and Storing Kale Seed.

Cathy, Danielle and Llyn with Red Russian kale - a powerhouse of nutrition!

Another important mission of the Sharing Gardens is to provide habitat for the wild species of flora and fauna that call this land 'home'. Though we are at the very farthest northern reaches of the Western Monarch population we have established three perennial patches of Showy Milkweed, the host plant for the Monarch (and sole diet of the Monarch's caterpillars). We've yet to see a Monarch in our yard but there are plenty of other pollinating insects that just love it's sweet nectar. Here's a How-to post for growing milkweed from seed: How to help the Monarch Butterflies - Starting milkweed from seed

Adri and Kaylyn with Showy Milkweed plants

February is grape-pruning time in our area. Below is a link to two resources we've found to be incredibly helpful in learning the proper ways to prune grapes. The post includes both a video and an article with excellent pictures and descriptions to guarantee your success!

In previous years, we had experimented with different methods of pruning. Our theory was: the more fruit spurs we left behind, the more fruit we'd get from them. It can be a bit anxiety-producing to cut off a lot of plant material and reduce your grapes to just two canes and two renewal spurs (for next year's growth)! In truth, by cutting back the plants so radically, you may get fewer bunches but the ones you get will be larger and more filled out and easier to harvest. Click here for The Best video and article (we've found) on Pruning Grapes.

A fraction of our harvest following the cane method of pruning.

And lastly, we read an inspiring article about a woman who has been living without money for ten years. She said:

“I actually feel more secure than I did when I was earning money, because all through human history, true security has always come from living in community and I have time now to build that ‘social currency’. To help people out, care for sick friends or their children, help in their gardens. That’s one of the big benefits of living without money.” (To read the full article, click here: An Amazing Synchronicity! (and a woman who's lived 'money-free' for ten years!)

And, if you've any doubt about the connection between 'sharing' and 'abundance', please enjoy this marvelous, short video by our friend and partner in sharing Nick Routledge:

(In case this newsletter was forwarded by a friend, or you've just stumbled on our website for the first time and you would like to be added to our list to receive future newsletters, send us an email at the Sharing Gardens: shareinjoy AT gmail.com) "Bee" well!  Chris and Llyn

Sharing Gardens Founders and Stewards: Chris and Llyn