A unique and viable approach to establishing local food self-reliance and building stronger communities.

Wednesday, August 27, 2025

Service Learning: A new model for our schools?

Greetings friends of the Sharing Gardens, near and far! It's been over two months since we last posted. Spring-time planting can be all-consuming but we hope you'll find the wait has been worth it.

Since 2012, the Sharing Gardens has partnered with Oregon State University to offer Service Learning experiences for their students. Through this program, students receive college credit for volunteering in the community and making a presentation to the rest of their class highlighting what they learned. Their participation in Service Learning typically counts for about a third of their grade. 

"Service learning integrates meaningful service with reflection to enrich the learning experience. A form of experiential learning, it provides a hands-on opportunity for students to make a difference while applying what they’ve learned in their classes." 
Quoted from OSU - Service Learning webpage
 

Planting seeds.

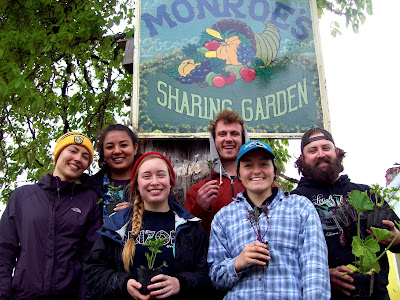
A Service Learning group consists of four to six students for four hours.
Our groups have always come from either a class on Soil Science or Sustainable Living so their experience is relevant to their studies. 

A typical group has four to six students. Often they will take home plant 'starts' for their own gardens.

Chris and I always feel incredibly grateful for the amount that gets done when the students come. We typically reserve the 'big stroke' projects for these helpers. For example, they have helped us with planting, turning huge compost piles and distributing the compost and mulch around the gardens but we try to make it fun and educational as well so we often include other hands-on gardening projects such as planting seeds and 'starts' and have them harvest produce and process dried beans and grains. 

Planting: 

Amy, planting onion seeds.

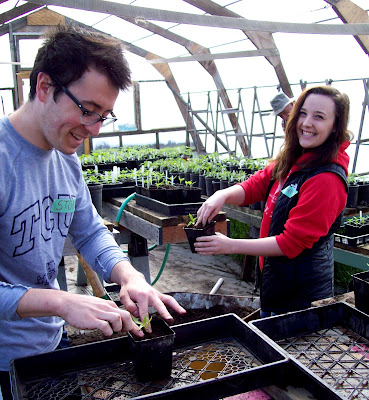
'Potting-up' tomato starts.

Blueberry bushes planted in 2014 now yield 2-gallons of berries or more, each year.

Tree-planting in 2014. Those slow-growing red maples are 4' tall today.

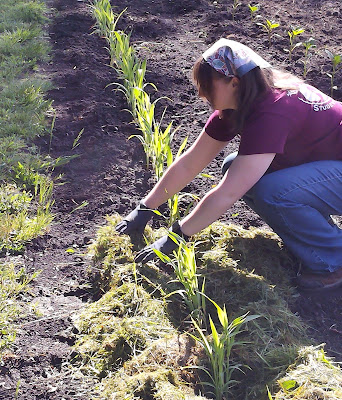
Sprouted corn finds its new home in the ground. Guideline strings help students keep the rows straight.

Teamwork makes any project more fun.
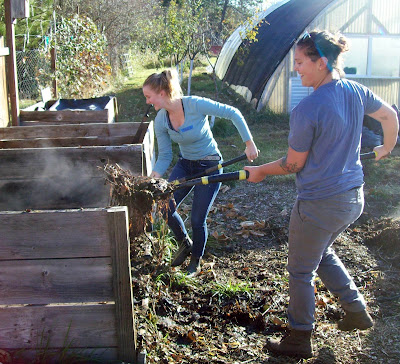
Turning compost piles:

Some groups especially enjoy the vigorous demands of turning compost piles.

There's something very satisfying about moving a big pile of material from one spot to another. By turning the piles, we introduce oxygen which causes them to cook down faster and be ready to use in the Gardens.

A job well done!

Distributing mulch and compost:

Every autumn, members of our small town bring us trailer-loads of leaves. Students help distribute them as mulch. These gals loaded leaves into carts...

These gals dragged them using tarps. Over the winter, these leaves break down and feed the soil for spring plantings.
 
Many years, students have spread wood-chips around our fruit trees. These keep the soil temperatures and moisture levels even. 

When we don't have enough wood-chips, we mulch our trees with leaves.

Grass clippings provide the same functions as wood-chips for our annuals (soil temperature and moisture moderation). These are baby sorghum plants.

Compost, after being loaded into buckets is carried to where it's needed. In this case we were preparing the ground to plant cucumbers and winter squash (both are heavy feeders).

Autumn clean-up:

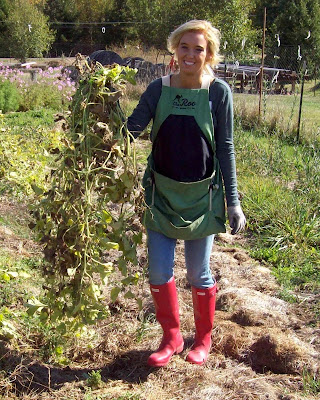
Our autumn groups help with putting the gardens to bed. Most plant-material goes back into the compost piles to decompose over winter...And the cycle starts again.

A whole long row of pea-plants filled this garden-cart to overflowing!
 
In addition to the 'big-stroke' projects, we try to keep things fun and educational as well:

Chris teaching about planting seeds in tofu containers.

Sifting compost is a relaxing step that helps us build our potting mix.

We grew a lot of tomatoes that year (over 200 in the garden! and an equal number of 'starts shared in the community). Here, students were learning how to transplant them to bigger pots.

Harvesting produce:

Apple-picking in the misty autumn...

Everyone seems to enjoy the fun of digging potatoes!

Harvesting lettuce in the spring.

This group harvested and bagged all that lettuce for us to donate to a food pantry.

Processing dried beans and grains:
 
In the fall there are lots of dried beans to be pulled of the vines, shelled, winnowed and stored for winter soups.

More bean-processing. There's something ancient and deeply satisfying about these hands-on methods of growing and storing food.

In the fall, students all harvest winter squash (pictured: Sweet Meat squash)

A typical session includes Introductions: so they understand the philosophy behind the Sharing Gardens and we get to know them too. We then move outside for about two hours of focused garden-time. By this time the students have built up, both an appetite, and a load of questions about our philosophy and methods so we traipse back into our cozy farmhouse for a snack and Q&A. 

A recent group enjoying popcorn and herbal tea/lemonade during our Q&A session.

They ask many important questions, ranging from the practical, to the philosophical

Students ask great questions like: "How do you grow so much food without commercial fertilizers, manure or animal by-products?". This explains our methods: Making Your Own "Veganic" Potting Soil in Your Greenhouse Paths - Using Worms
 
The Sharing Gardens isn't only about gardening...we are also modeling a philosophy of generosity. This video by Alecia Renece sums it up beautifully: LINK: the only way to live an abundant life

Sometimes students experience their first contact with wild animals in our Gardens. Here, a student lets a baby garter snake flow through her hands.

Typically we'll have time for one more pulse of activity in the gardens. We always end by sharing with them fresh-harvested produce and plant 'starts' (if we have any) for those who have garden access where they live. 

Students receiving freshly harvested produce from the Gardens. Many of them try new foods for the first time...
 
...or find that veggies they never liked before taste much better when grown organically.

 “Students gain … community-building opportunities with both the community partners and with one another,” said Assistant Professor Natchee Barnd, who teaches several service learning courses in the College of Liberal Arts. “The students consistently report these activities as the single most memorable and impactful experiences of the class. They are able to concretely apply their learning to ‘real world’ situations and contexts.” 
This group had a great time! Can you tell?

We are so grateful for how much the students contribute to the cultivation of the Gardens but our greatest joy comes from meeting them, many of whom sincerely want to help the world become a better place. This gives us hope and a sense of meaning and purpose in what we do. We're planting seeds, not only to grow food but in the hearts and minds of those who feel touched by the Sharing Gardens Mission.

"I had SO much fun with this project. Chris and Llyn were great communicators and seemed genuinely delighted to have us there. We enjoyed their wealth of knowledge, patience, cheerfulness, and willingness to teach." 

"Honestly, I wish more student-groups could do the Sharing Gardens. It was extremely fulfilling and fun, and I learned a lot about soil. I think adding more partners like Chris and Llyn would increase students' engagement in the community as well as their understanding of soil health and what a healthy, productive garden looks like." 
Olivia - Service Learning student - May 2025

Olivia (right) has continued to volunteer in the gardens since completing her Service Learning assignment. She even enrolled a friend (who wasn't in the class but thought it sounded fun). We appreciate her cheerful willingness to do whatever is needed and her curiosity in learning the ways of the Sharing Gardens. (I think she also likes the free veggies we send home with her and Milan at the end of each session <smile>).

Olivia, laying Golden Amaranth out to dry.
 
Olivia's friend, Milan - trimming garlic.

Since 2012 we've hosted 55 groups! We hope this partnership continues for many years to come! Video made by a Service Learning student in 2017 

Wouldn't it be wonderful if all our school systems integrated 'service learning' into their curriculum?

Monday, August 25, 2025

Saving Tomato Seeds

Striped German - Heirloom tomato
One of the missions of the Sharing Gardens is to educate people about the importance of seed-saving and to offer techniques to demystify this process. Today's blog covers the practical steps necessary for saving one of the home-gardener's favorite fruits: the tomato! If you're new to seed-saving tomatoes are good to start with because of their relative simplicity.

In order to save seeds that will "grow true" and produce fruit similar to the one you saved seeds from, you must start with an "heirloom" or "open-pollinated" (OP) variety (not hybrid). Hybrid seeds are artificially created by seed companies to produce plants with unique qualities (early ripening, bug resistance etc). The problem is that they don't "breed true". If you save seed from hybrids, next year's plants may or may not be what you want. If you wish to save seeds, choose seeds or starts that say "open pollinated", OP, heirloom or non-hybrid.
 
"Heirloom" tomatoes come in all types: here are large paste-tomatoes called "Long Toms"
 
OK, so lets say you have grown some beautiful heirloom tomatoes and you're ready to save seeds. If you have more than one plant to pick from, choose the plant that is healthiest, most robust, earliest to ripen and with the largest and/or best-tasting fruit. Then, pick several fruits that are the best examples of these same qualities. If you've grown out several plants of the same variety, save seeds from multiple plants to keep  genetic diversity.
 
If there are other people who harvest from your garden
, put a twist-tie, or in some other way mark the fruit so no one picks it prematurely. We often use onion or citrus bags (plastic, stretchy netting - Left) so we can actually cover the fruit, making it clear that it's not to be picked. Let the fruit come to fullest maturity possible. It's OK even if it starts to rot a little.

Black Krim (below) and Striped German
Here are two heirloom tomato varieties we saved for seed this year (right). We saved them as beautiful examples of color, juiciness and size. That's a Black Krim on the bottom and a Striped German on the top.

In saving seed, you wish to mimic nature's process. Have you ever noticed what happens to the tomatoes left in the garden after the first frost? They turn to a slimy mush, with the fruit eventually dissolving away from the seed. In the following year, robust little volunteers emerge from where the tomato rotted. The way we mimic this process: 
Remove the stem from your chosen tomato and put it in the blender with enough water to fill a quart jar. (We have well-water which has no chlorine and I'm not sure if chlorine would be a problem so, for best results, use filtered water, without chlorine.)
Whiz it in the blender, at a low speed, just long enough to separate seeds from fruit. Don't worry about the seeds. They have a protective gel that keeps the blades from harming them. Pour them into a wide-mouth glass jar. Be sure to swirl the blender as you pour the last liquid out so no seeds are left in the bottom. 
If you're processing more than one tomato variety in a row, rinse the blender well so you don't mix seed varieties.  
Label the jar so you remember the variety of seeds you're saving.

The next step is to leave them to "rot". To minimize fruit-flies secure a piece of cheese cloth over the opening with a rubber-band or canning-jar ring. Leave them in the open jar for 4-7 days. When it's warm outside, the process will go faster. Stir them once or twice a day with a chopstick to help separate the seeds from the pulp. The pulp and non-viable seeds will form a layer at the top. The healthy seeds will sink to the bottom. Look for a nice scum to form on the top. Mold is OK. The picture below, on the left is of two varieties of tomato seeds in process. The ones on the right were just blended so no layers have formed. The ones on the left have been sitting a few days. The other picture shows the quality of the scum that has formed on the tomatoes once they are ready for the next step. Notice the bubbles which indicate a mild fermentation process.


The last step is to dry the seeds. Spoon out the scum and pour off most of the water. The viable seeds will have sunk to the bottom but be careful not to pour them out with the pulp/water. Add more (filtered/well) water, allow to settle and continue to pour off excess flesh. Repeat this process till you've removed the majority of the flesh and are left with just seeds and water (or as close to that as possible). 
 
Then pour the seeds through a fine-mesh strainer and rinse them in the strainer. Let them drip-dry and then tap them onto a piece of tin-foil, a jar-lid or other non-porous surface. We find that the lid to a plastic tub (like a yogurt container) works best as it's flexible and we can "pop" off the seeds after they've dried. Seeds will stick to paper towel or napkins. 
 
Transfer your label to the drying seeds and leave them to dry for a week or so. Place them on a table or shelf out of direct sunlight and safe from animals (we had a whole batch of seeds eaten by a mouse when we left them on a low shelf they could access). Be sure they are thoroughly dry before storage so they don't mold in the bag, envelope or jar.

Each seed-saver has his or her preference for containers to store seeds in. We use clean, small plastic bags or recycled plastic pill-bottles or other small jars. The most important thing is to keep your whole seed collection in a dry, dark environment with moderate temperatures, in air-tight containers. Avoid freezing or excessive heat. Stored well, tomato seeds can remain viable for many years.

Tomato seeds drying.