A unique and viable approach to establishing local food self-reliance and building stronger communities.

Showing posts with label Spring. Show all posts

Saturday, May 2, 2026

Get your seed potatoes from your grocer's now...

Time to look for sprouting potatoes in your local produce section for planting! Be sure to get organically grown potatoes (ones grown conventionally can be treated with a chemical sprout retardant). Choose ones that are about the size of a large chicken egg. Also find ones that are already showing the first signs of sprouting. For more in-depth information, Sprouting potatoes? What to do.

The yellow one is showing the first signs of sprouting: tiny yellow sprouts at the site of the 'eyes'. That's what the red one looked like about a week earlier. 

One week later, both potatoes continue to sprout.

I have kept these sprouts under a towel while they are sprouting, in a cool (not cold) space. Once you expose them to light, they will pause extending their sprouts. Be careful handling them as the sprouts grow as they can be fragile at this stage.

Once sprouts are about one inch long, we move them to a room where they receive _indirect_ sunlight. This will 'chit' them (help them store up the sun's energy for better growing). Be sure they _aren't hit_ with direct sun.

The potatoes will turn greenish and the sprouts will stiffen. Once they are chitted, proceed with your favorite planting methods.

Here's a row of potatoes planted in our greenhouse about a month ago. Potato leaves are very frost-sensitive. We start early batches in our greenhouses in February and March (Oregon, USA, Zone 7b) and later batches in April and May once the threat of frost is past.
Happy planting!

Local food: Grow your own beans and grains

It's time to be planting grains and beans in our area (Willamette Valley, Oregon USA, USDA Zone 7b). Every year we grow a yellow corn and a blue corn, two kinds of sorghum and amaranth; all of which we dry down, hand-process and grind for use in cereal and baking. We also grow lots of Scarlet Runner beans (pictured left) and kidney beans to be dried and used for cooking throughout the year. Here are links to show you our methods. 

Grow Your Own 'Blue Corn' Blue corn is higher in protein than yellow corn and it makes a delicious, sweet addition to your hot-cereal mix or baking recipes - Crumb-Free, Whole-Grain Cornbread Recipe . Here is info on growing and processing this heirloom grain, native to north America.

Corn bread made from a combination of blue and yellow corn we grew ourselves.

 Grow Your Own Protein - Scarlet Runner Beans
: If you're interested in growing your own beans for winter-storage, this is a great variety to choose. Because the beans are so large, they are easy to process in the fall after you harvest them. They DO need trellising but adapt well to growing on a teepee, giving you a beautiful and fun, shady hide-out through the summer. If picked young, the beans and pods are even edible!

Shelling dried Scarlet Runner Beans is a favorite activity in the fall....
 

Grow your own Sorghum for grain and flour: Sorghum is a relatively easy grain to grow and process on a small to medium scale. It doesn't require heavy-feeding/fertilizer nor lots of water. We grow two varieties, BaYeKi, short-season, short height, less sweet; ideal for chicken feed but also fine for human consumption. And Kassaby, tall, long-season (often needs trellising to prevent lodging); it has a sweet, wonderful flavor. Canes can be used for making syrup (but you have to choose either syrup or grain; you can't have both).
 
Kassaby sorghum being laid out to dry before being removed from stalks.
Most seed-saving doesn't happen till the fall but, if you want to save seeds from your crops, here are some things to be thinking of as you plant your crops in the spring:  Basic Seed-Saving on a Small Scale. Happy Growing!
 
Image credit: Seed abundance! Mike Brunt

Sunday, April 12, 2026

Spring has sprung! Here we go again...

Greetings dear friends, near and far. Spring has sprung here in Oregon! A few weeks ago we had a flush of sunny days in the low 70's-F and it made everything surge into growth-mode! Fruit trees are blossoming, bulbs are blooming, grass is growing (which we harvest and use for mulch and to create compost in our greenhouse paths: LINK). Though winter isn't entirely over yet, it feels good that the seasonal wheel is turning toward warmth and longer days. (Image: apple blossom behind our farmhouse).

Rainbow over The Ark greenhouse.
This post contains several articles we hope you will find relevant to our times: Info on building a small greenhouse out of a metal carport frame; How to build a bean tipi/teepee and an organic solution to slugs. 
Two teepees in front of our greenhouses; ready for bean planting.
The opening article
is a deviation from the usual "How To" posts on this site and addresses the enormous challenges of our times from a Gandhi-an, solution perspective. We hope you will find it inspiring.
Image by Llyn Peabody
Lastly, if you are local to our town and would like to join us for a season of food-growing/seed-saving/food-preservation fun, there's a link to our volunteer page too. (Oh, and don't miss the short, sweet, uplifting video at the very end; a little wisdom from Andy and Opie Griffith)

Volunteers sifting mushroom compost.
At this time of world upheaval, environmental destruction and division among people, it is so good to hear coherent, wise voices, guiding us in ways that will help us heal the world. Nipun Mehta is one of those voices. He is the founder of ServiceSpace, a global ecosystem working at the intersection of technology, volunteerism, and a culture of generosity. Click here for an introduction to an article he wrote that explores the need to balance our activism/protesting (10%) with positive, creative actions (90%): Science of Soul Force: How Your Heart Changes the World. Brilliant!

Organic Solution to Slugs - Iron Phosphate: If you live in a moist climate like the Pacific NW, slugs and snails can be so destructive and disheartening! This post outlines our journey from the beginnings of our garden here in Monroe (2010) when whole rows of lettuce were consumed or damaged beyond recovery in a single night (!) to the present-day when we hardly ever see any slugs or snails in our gardens at all. If you don't want to read the whole post, the solution we found is: iron phosphate pellets (coated in something like oat-flour) - commercially known as Sluggo. It basically constipates the gastropods, disrupting their reproductive cycle.

Carport-Frame Greenhouse Design: Current world upheaval is catalyzing a resurgence in interest in growing ones own food. Having the ability to start seedlings at home and grow them to the point where they can be transplanted outside will give you a real jump on the season and it can be incredibly empowering (not to mention fun, and healing to one's nervous system!). All of our greenhouses have been positioned directly on the ground and we've built raised beds within them. We use saw-horses and slatted tables to start seedlings in the spring which are removed in time to plant in the beds later in the season for warmth-loving crops like tomatoes and peppers. An efficient use of space! This post will walk you through the step-by-step process of turning a metal carport frame into a sweet, functional greenhouse!

How to build a Bean Tipi/Teepee: In recent years, the Sharing Gardens have shifted the types of crops we grow towards a greater emphasis on storage crops like dried corn, sorghum and beans. Pole beans can take up a lot of space and resources if you trellis them in a straight line. We've found that growing beans on tipis is a very efficient use of space. Another advantage is that tipis can be disassembled and stored out of the way in the winter and then set up in a new site the following season. They also look great and make a fun hiding place for kids in summer's heat. Enjoy!

Potato harvesting at the Sharing Gardens
Volunteering and Garden Location: Participating at the Sharing Gardens is more than your typical volunteer experience. We welcome share-givers (volunteers) to share in learning how to grow food without chemicals or animal by-products to create fertility in a spirit of mutual generosity.

If interested, participants will learn about the full seasonal growing cycle: from planting seeds, growing them out, harvesting and preserving food, and saving seeds for the future. 
 
Everyone who contributes to the
Sharing Gardens, whether through time, money or materials, shares in the the harvest. There is a wonderful feeling of camaraderie and closeness that develops amongst the people who help grow and harvest the food.  Our surplus fruits and vegetables are donated to local food charities. 

We have a limited number of spaces open for share-givers for the 2026 season. If you'd like to learn more, click here and be in touch.

Andy and Opie: Generosity, Charity and Being Selfish: The Andy Griffith Show often dished up some poignant lessons about being a good person in the world. Here's a precious little clip where Andy wrongly accuses Opie of being selfish. A great message overall...(and as gardeners who rely largely on worms to help us create compost for soil fertility, we especially enjoyed Opie's perspective on life as a worm!). (LINK) 

The Sharing Gardens is a registered non-profit and tax-exempt organization. We exist entirely through donations. If you have found benefit from our project or our site, please consider making a donation through PayPal. A receipt will automatically be provided for your records.

Sunday, March 29, 2026

Locally Sustainable Gardening in the Face of Supply-Chain Shortages

Originally posted at the beginning of the pandemic, in May of 2020,
this post is even more relevant this year! Seeds are becoming ever more expensive and in some cases, harder to find. Also, due to current world events (spring 2026) fertilizer and other commercial amendments may also become more expensive and harder to find.
 
For years, the Sharing Gardens has been anticipating shortages, and higher prices on fertilizers and soil amendments. This is why we've been developing and perfecting our methods of creating soil-fertility from locally available materials such as leaves, grass-clippings, wood ash and coffee-grounds. (See links below).

Fertility without fertilizers (commercially-made ones that is...). Sharing Gardens - July 2019
Sharing Gardens - late July - 2019
This year we didn't purchase or use any fertilizers or amendments (including livestock manures) and we created our own potting mix from the worm-castings we harvested from our greenhouse paths, mixed with a courser compost our neighbor produced from hard-wood sawdust, coffee grounds, leaves and grass clippings (with a lot of help from his worms!)(Spring 2026: this will be our 6th season using 'veganic' methods). Here are articles about this "veganic" method we are using with great success.

Lovely compost!
Making your own "Veganic" (no animal manures) Potting Soil

Grass Clippings and Leaves for Mulch

Coffee Grounds and Wood-Ash for Fertility
 
The Ground to Ground Primer - Coffee grounds for your Garden

We have seen many headlines, and heard from fellow gardeners  about vegetable-seed shortages. If you would like to learn about saving many of your own seeds, here is a post with info on saving many kinds of seeds in your own garden for use next year.

Saving squash-seeds
Family Heirlooms: Saving Your Own Seed

Please keep in mind that sustainable gardening practices at a local level will be far more successful if you build cooperative relationships with your neighbors instead of trying to do it all alone. Here is a link to many resources about how to start a Sharing Garden in your own community.

Gardening with a group! Many hands make light work...

Tuesday, February 17, 2026

Transplanting Beet Seedlings

A few years ago, we discovered that beet seedlings transplant quite readily. Your nursery soil must be quite loose (so the beet roots don't get damaged when you dig them up) and you need to prep the receiving soil also to minimize transplant shock. This saves seed, and room in the germination process as you only transplant the viable seedlings.

To initially plant the seeds, dig a shallow trench and water thoroughly. The trench assures that future waterings channel the water directly to the seedlings and their roots and they're less likely to dry out between waterings. 

Lay out seeds on the surface of the trench about 3/4" apart and cover them with a light sprinkle of sifted soil and gently push them into the soil so they have good contact. 

Beet seeds in the lower, left foreground. A clear plastic nursery cover placed over them keeps them moist (showing at left of picture). We've used plastic sheet-cake covers too, that we rescued from recycling. If the soil starts to dry out, water gently using a watering can (so the seeds don't float away).

To transplant: once seedlings have leaves that are 2"-3" tall, prepare another shallow, well-watered 'groove' to transplant them into. While the seedlings are still in the nursery, cut the tops off, leaving about 1-2" of greens attached to the root. The cut greens can be eaten in a salad or lightly steamed...Water the roots well before gently prying them out of the nursery soil. We put ours on a tray to carry them to the new transplant site.

If dug up when beet plants are young, they can be successfully transplanted to a new site with great success.

Transplanting is best done on a cool/overcast day to minimize shock. It can also be done in the evening so the beets have a chance to settle in before being subjected to full sun. Make planting-holes with your finger or dowel 4-5" apart. Place a beet root in each hole and gently squeeze soil back around them, even with the level they were in the ground in the nursery bed. 

Water them thoroughly, and water twice a day till they're well established. 

Here, Donn uses a piece of bamboo to make holes for the seedlings. They are planted about 4 inches apart.  

Three rows of beet seedlings shortly after transplanting.

In this picture, Donn is transplanting beets. Llyn, on the right is planting lettuce seedlings. (for more info, see below). 

Our current favorite way to grow lettuce seedlings: in egg cartons. Each seedling is torn individually from the carton, including the egg carton cell, seedling and soil. The roots grow right through the egg cartons. Transplanting them this way reduces transplant shock. Each 'cell' is planted 6-8" apart.  When they get big, we harvest every other one so the remaining ones can get even bigger. (Growing Seedlings in Egg Cartons).

Friday, January 9, 2026

Growing lettuce seedlings in Egg Cartons

We often start lettuce plants in egg cartons! The egg cartons use less soil per plant than your typical nursery 'six-packs' and when it's time to transplant the seedlings, we just tear off a cell and plant them directly in their permanent bed; egg carton and all! The roots grow right through and have very little transplant shock. We love that the cartons are biodegradable so we're using less plastic in the gardens. Also, they're free!

Here's a step-by-step post on how we do it.
 
When it's time to plant the 'starts' in the ground, we remove the 'lid' of the egg carton that had become the tray that held the egg carton cells while the lettuce plants were growing. This can be composted. Then we just tear off each cell and plant directly. Roots grow right through! (You can see little, tiny roots coming through the bottom of the egg carton 🙂 ) 
 
We start the seeds in a tofu container with holes drilled in the bottom. We're vegetarian and, as you can see from the picture, we eat A LOT of tofu! Three to five drainage holes is plenty. Holes should be 3/8" - 1/4". (You can make a bunch at once by stacking them and drilling through 10-15 at a time.)

Use finely-sifted potting soil so the seeds don't need to struggle to germinate. Pack it firmly and evenly (with the bottom of another tofu container) so the seeds are started on a flat surface and all come up at the same time. Water the soil. Don't plant too thickly and aim for an even distribution of seeds. This will make it easier to tease them apart and transplant them to the egg cartons later. 

Sprinkle a very light dusting of soil on top and press it down so seeds have good contact with the soil. Put the tofu containers in a tray and water from the bottom (so the moisture 'wicks' up until the first  leaves appear. Watering from the top can make the seeds spread unevenly. Don't over-water! Seeds need very little moisture to get started.

Once seedlings are about two inches tall, tease them apart and replant in the egg cartons, one plant per cell. It is important to handle seedlings by the stem, or leaf. Some of their root-hairs are almost too small to see with the naked eye and are easily damaged. (Pic: cabbage seedlings)
  
Tear the lids off the egg cartons and use them as trays under the egg cells. Strip off any labels with thick ink (they don't allow the water to drain well). Soak the egg cartons in a tub of water so they are saturated. Fill each cell with sifted, moist soil. Your seedlings will experience less shock if transplanted into moist soil. Gently water them in with a watering can or fine spray. Keep them in a shady spot for a few days while they get acclimatized. The egg cartons hold moisture while the plants' roots are developing.

We prefer to use egg cartons with no plastic-y labels or excessive printing which can interfere with proper drainage. Plain, pressed-paper egg cartons are biodegradable and compostable and the roots grow right through.

These seedlings were transplanted a few weeks before this picture was taken. Don't wait too long or the plants' roots will become entangled in the tofu containers and you risk damaging them when you transfer them to the egg cartons. On the other hand, if you try to do it when the seedlings are too small, it's much harder to work with them and their root systems may not yet be established and the plants may dry up and die between waterings.

To minimize the stress on your seedlings, do your 'potting up' in the shade or on an overcast day. Here, Donn and Chris are transplanting cabbage seedlings into tofu containers: six to a pot. Notice Chris is using a pen to make a hole to drop the little seedling into. Use this same method with the egg cartons being sure not to "J"-root the plants...All roots should be covered with soil; none sticking out.

Before planting the seedlings, we make a furrow in the soil and water it thoroughly. This means that the plants are going into wet soil (which makes them very happy) and, with each subsequent watering, the water is channeled towards the roots. 

In the picture above, the black nursery trays (behind the lettuce starts) are covering other recently transplanted lettuce. This shades them to minimize transplant-shock and discourages birds from coming in and helping themselves to spring-time 'salad'. After 4-7 days, we can usually remove the trays without a problem.

Many weeks later...

It's fun to mix colors/types of lettuce...

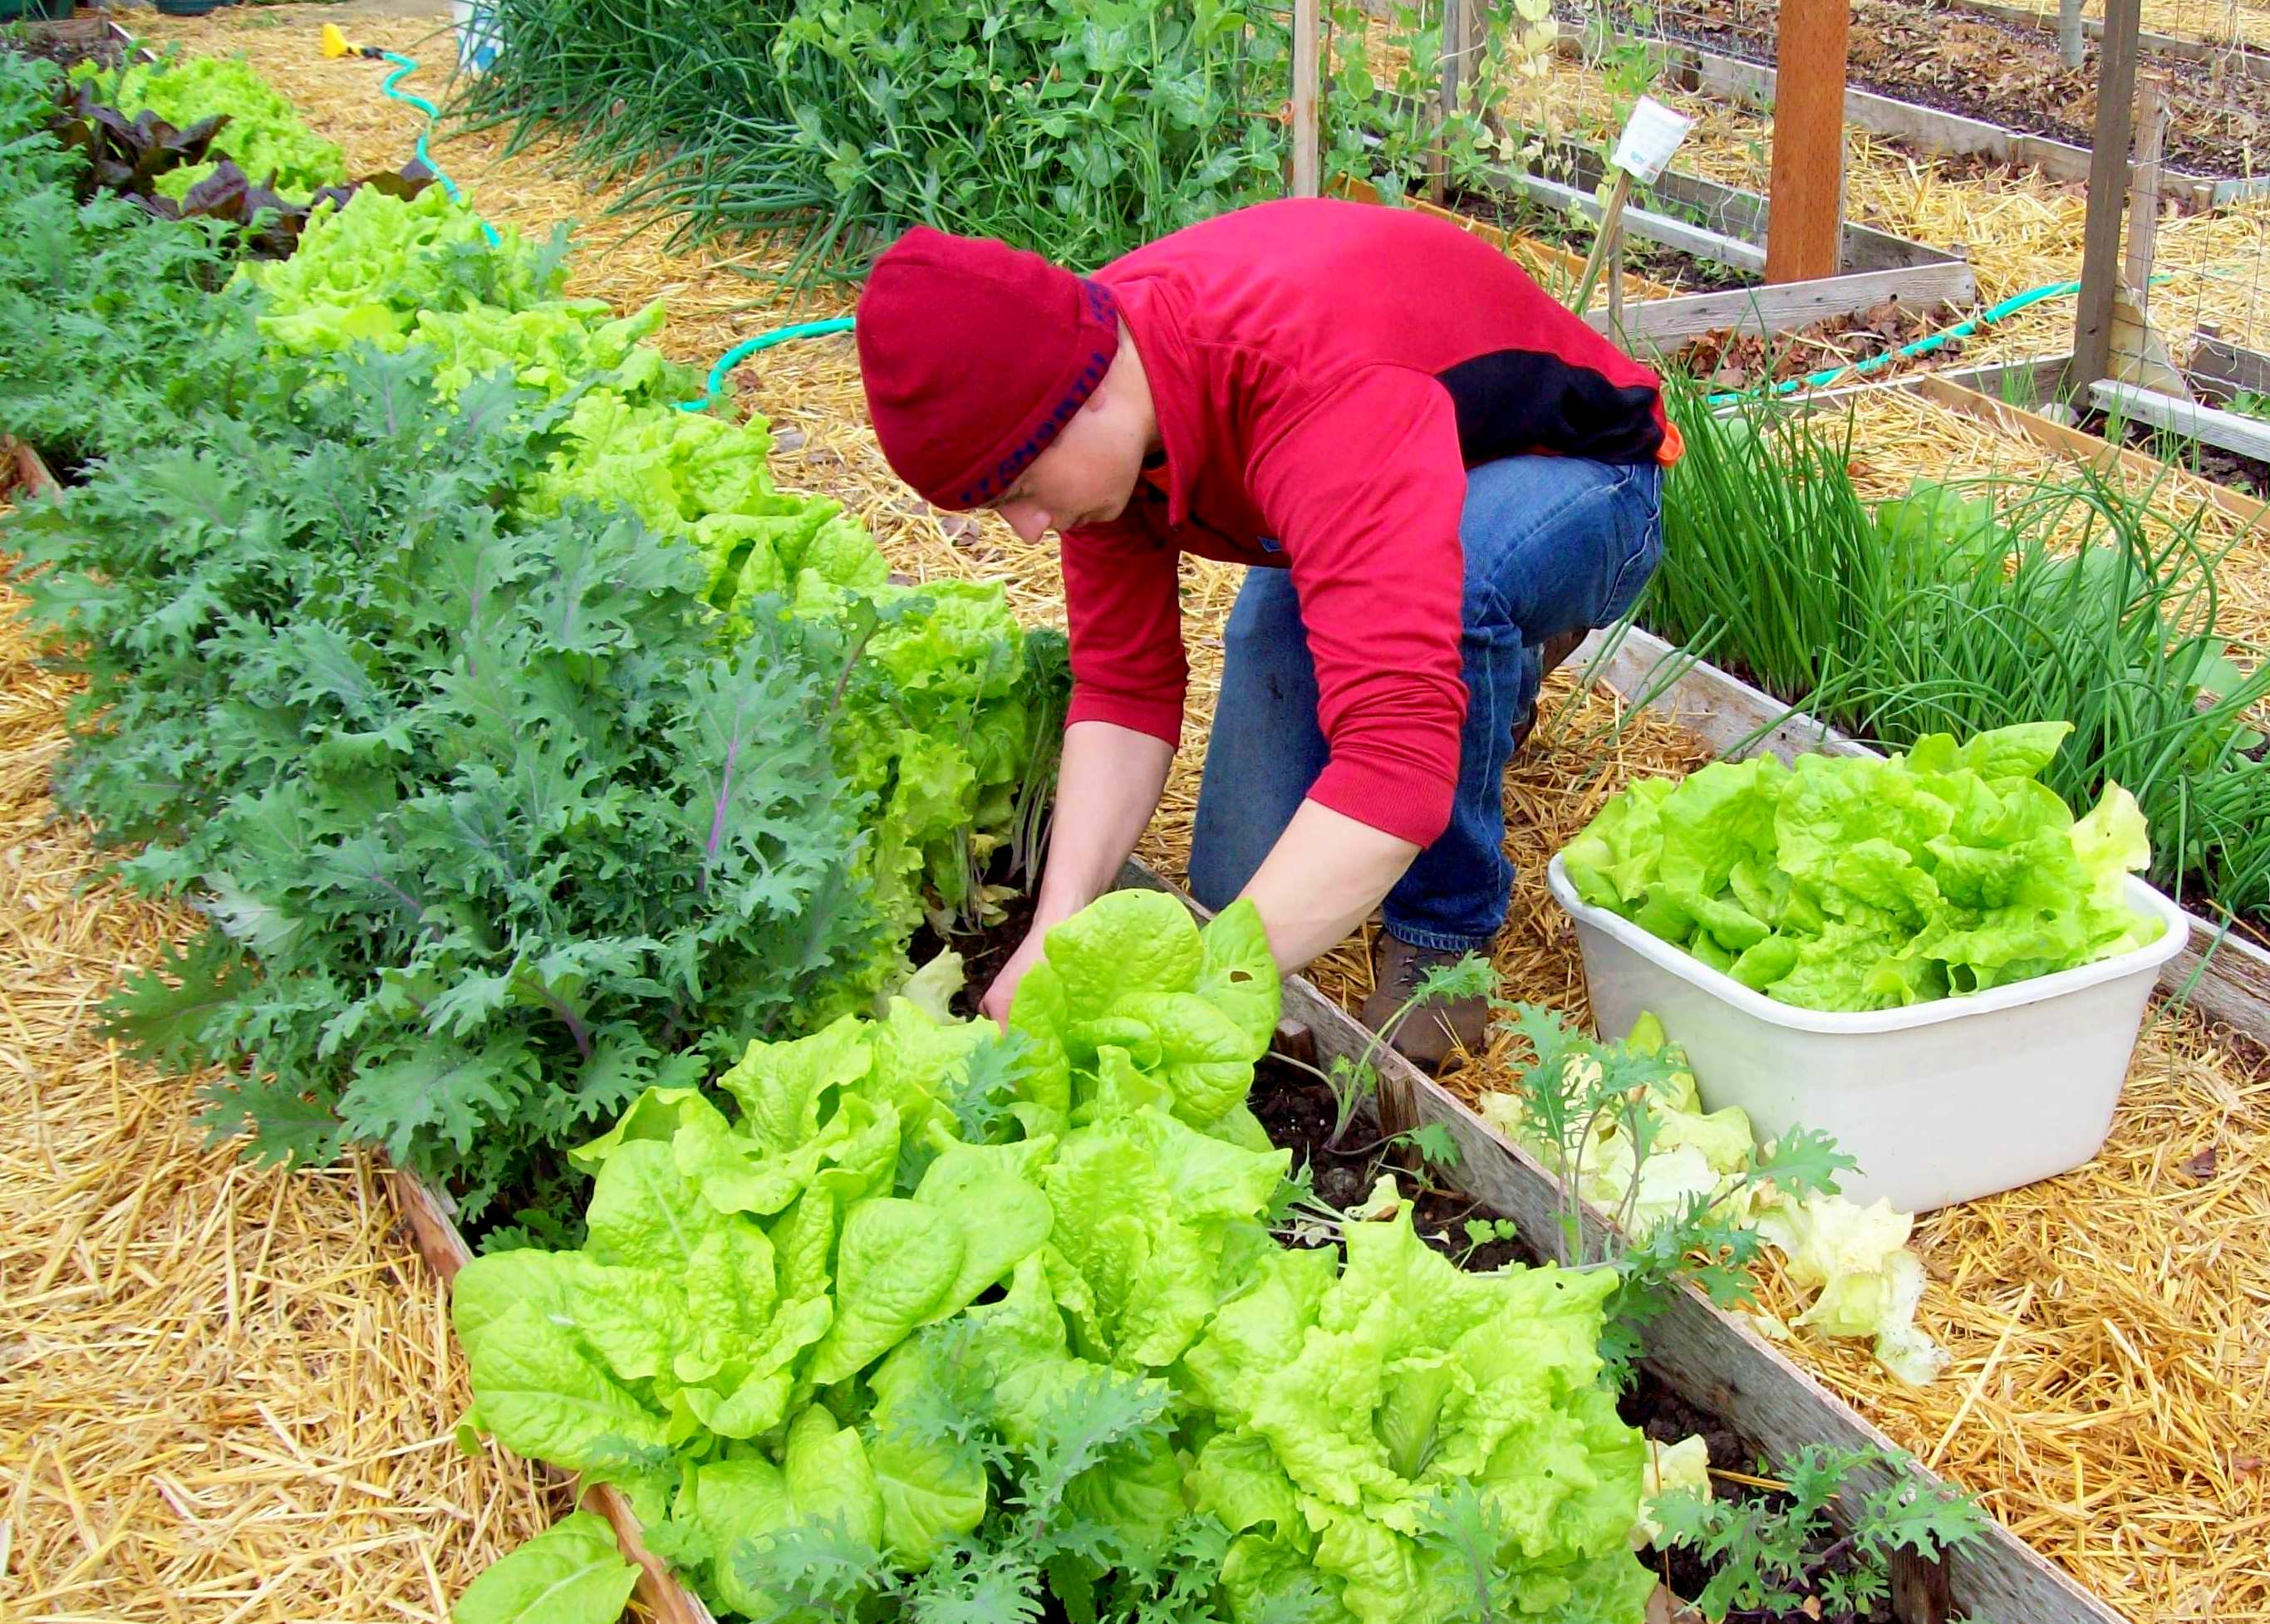
Lettuce heads are harvested once they reach full size. Here, a Service Learning student harvests Slo-Bolt lettuce for us to share.

Now, that's some beautiful lettuce!