A unique and viable approach to establishing local food self-reliance and building stronger communities.

Saturday, July 19, 2025

Service Learning: A new model for our schools?

Greetings friends of the Sharing Gardens, near and far! It's been over two months since we last posted. Spring-time planting can be all-consuming but we hope you'll find the wait has been worth it.

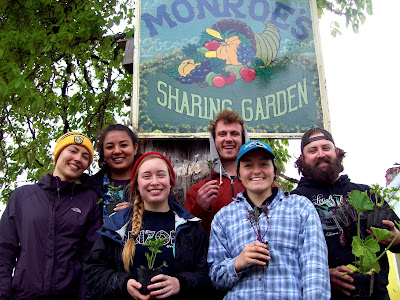
Since 2012, the Sharing Gardens has partnered with Oregon State University to offer Service Learning experiences for their students. Through this program, students receive college credit for volunteering in the community and making a presentation to the rest of their class highlighting what they learned. Their participation in Service Learning typically counts for about a third of their grade. 

"Service learning integrates meaningful service with reflection to enrich the learning experience. A form of experiential learning, it provides a hands-on opportunity for students to make a difference while applying what they’ve learned in their classes." 
Quoted from OSU - Service Learning webpage
 

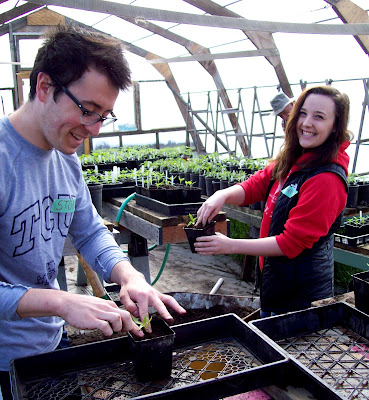
Planting seeds.

A Service Learning group consists of four to six students for four hours.
Our groups have always come from either a class on Soil Science or Sustainable Living so their experience is relevant to their studies. 

A typical group has four to six students. Often they will take home plant 'starts' for their own gardens.

Chris and I always feel incredibly grateful for the amount that gets done when the students come. We typically reserve the 'big stroke' projects for these helpers. For example, they have helped us with planting, turning huge compost piles and distributing the compost and mulch around the gardens but we try to make it fun and educational as well so we often include other hands-on gardening projects such as planting seeds and 'starts' and have them harvest produce and process dried beans and grains. 

Planting: 

Amy, planting onion seeds.

'Potting-up' tomato starts.

Blueberry bushes planted in 2014 now yield 2-gallons of berries or more, each year.

Tree-planting in 2014. Those slow-growing red maples are 4' tall today.

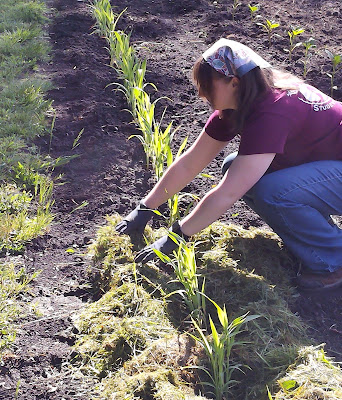
Sprouted corn finds its new home in the ground. Guideline strings help students keep the rows straight.

Teamwork makes any project more fun.
Turning compost piles:

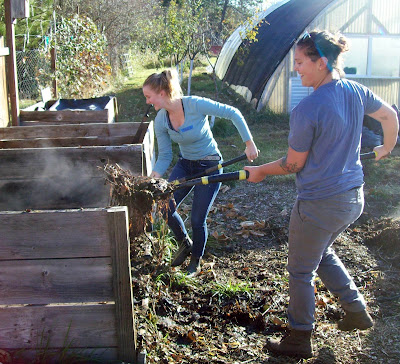
Some groups especially enjoy the vigorous demands of turning compost piles.

There's something very satisfying about moving a big pile of material from one spot to another. By turning the piles, we introduce oxygen which causes them to cook down faster and be ready to use in the Gardens.

A job well done!

Distributing mulch and compost:

Every autumn, members of our small town bring us trailer-loads of leaves. Students help distribute them as mulch. These gals loaded leaves into carts...

These gals dragged them using tarps. Over the winter, these leaves break down and feed the soil for spring plantings.
 
Many years, students have spread wood-chips around our fruit trees. These keep the soil temperatures and moisture levels even. 

When we don't have enough wood-chips, we mulch our trees with leaves.

Grass clippings provide the same functions as wood-chips for our annuals (soil temperature and moisture moderation). These are baby sorghum plants.

Compost, after being loaded into buckets is carried to where it's needed. In this case we were preparing the ground to plant cucumbers and winter squash (both are heavy feeders).

Autumn clean-up:

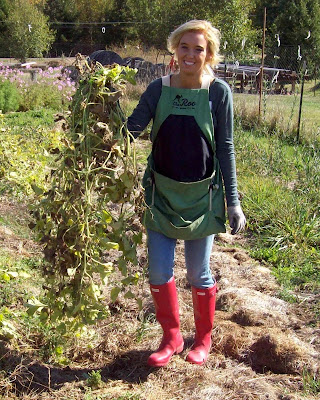
Our autumn groups help with putting the gardens to bed. Most plant-material goes back into the compost piles to decompose over winter...And the cycle starts again.

A whole long row of pea-plants filled this garden-cart to overflowing!
 
In addition to the 'big-stroke' projects, we try to keep things fun and educational as well:

Chris teaching about planting seeds in tofu containers.

Sifting compost is a relaxing step that helps us build our potting mix.

We grew a lot of tomatoes that year (over 200 in the garden! and an equal number of 'starts shared in the community). Here, students were learning how to transplant them to bigger pots.

Harvesting produce:

Apple-picking in the misty autumn...

Everyone seems to enjoy the fun of digging potatoes!

Harvesting lettuce in the spring.

This group harvested and bagged all that lettuce for us to donate to a food pantry.

Processing dried beans and grains:
 
In the fall there are lots of dried beans to be pulled of the vines, shelled, winnowed and stored for winter soups.

More bean-processing. There's something ancient and deeply satisfying about these hands-on methods of growing and storing food.

In the fall, students all harvest winter squash (pictured: Sweet Meat squash)

A typical session includes Introductions: so they understand the philosophy behind the Sharing Gardens and we get to know them too. We then move outside for about two hours of focused garden-time. By this time the students have built up, both an appetite, and a load of questions about our philosophy and methods so we traipse back into our cozy farmhouse for a snack and Q&A. 

A recent group enjoying popcorn and herbal tea/lemonade during our Q&A session.

They ask many important questions, ranging from the practical, to the philosophical

Students ask great questions like: "How do you grow so much food without commercial fertilizers, manure or animal by-products?". This explains our methods: Making Your Own "Veganic" Potting Soil in Your Greenhouse Paths - Using Worms
 
The Sharing Gardens isn't only about gardening...we are also modeling a philosophy of generosity. This video by Alecia Renece sums it up beautifully: LINK: the only way to live an abundant life

Sometimes students experience their first contact with wild animals in our Gardens. Here, a student lets a baby garter snake flow through her hands.

Typically we'll have time for one more pulse of activity in the gardens. We always end by sharing with them fresh-harvested produce and plant 'starts' (if we have any) for those who have garden access where they live. 

Students receiving freshly harvested produce from the Gardens. Many of them try new foods for the first time...
 
...or find that veggies they never liked before taste much better when grown organically.

 “Students gain … community-building opportunities with both the community partners and with one another,” said Assistant Professor Natchee Barnd, who teaches several service learning courses in the College of Liberal Arts. “The students consistently report these activities as the single most memorable and impactful experiences of the class. They are able to concretely apply their learning to ‘real world’ situations and contexts.” 
This group had a great time! Can you tell?

We are so grateful for how much the students contribute to the cultivation of the Gardens but our greatest joy comes from meeting them, many of whom sincerely want to help the world become a better place. This gives us hope and a sense of meaning and purpose in what we do. We're planting seeds, not only to grow food but in the hearts and minds of those who feel touched by the Sharing Gardens Mission.

"I had SO much fun with this project. Chris and Llyn were great communicators and seemed genuinely delighted to have us there. We enjoyed their wealth of knowledge, patience, cheerfulness, and willingness to teach." 

"Honestly, I wish more student-groups could do the Sharing Gardens. It was extremely fulfilling and fun, and I learned a lot about soil. I think adding more partners like Chris and Llyn would increase students' engagement in the community as well as their understanding of soil health and what a healthy, productive garden looks like." 
Olivia - Service Learning student - May 2025

Olivia (right) has continued to volunteer in the gardens since completing her Service Learning assignment. She even enrolled a friend (who wasn't in the class but thought it sounded fun). We appreciate her cheerful willingness to do whatever is needed and her curiosity in learning the ways of the Sharing Gardens. (I think she also likes the free veggies we send home with her and Milan at the end of each session <smile>).

Olivia, laying Golden Amaranth out to dry.
 
Olivia's friend, Milan - trimming garlic.

Since 2012 we've hosted 55 groups! We hope this partnership continues for many years to come! Video made by a Service Learning student in 2017 

Wouldn't it be wonderful if all our school systems integrated 'service learning' into their curriculum?

Friday, June 27, 2025

Growing lettuce seedlings in Egg Cartons

We often start lettuce plants in egg cartons! The egg cartons use less soil per plant than your typical nursery 'six-packs' and when it's time to transplant the seedlings, we just tear off a cell and plant them directly in their permanent bed; egg carton and all! The roots grow right through and have very little transplant shock. We love that the cartons are biodegradable so we're using less plastic in the gardens. Also, they're free!

Here's a step-by-step post on how we do it.
 
When it's time to plant the 'starts' in the ground, we remove the 'lid' of the egg carton that had become the tray that held the egg carton cells while the lettuce plants were growing. This can be composted. Then we just tear off each cell and plant directly. Roots grow right through! (You can see little, tiny roots coming through the bottom of the egg carton 🙂
 
We start the seeds in a tofu container with holes drilled in the bottom. We're vegetarian and, as you can see from the picture, we eat A LOT of tofu! Three to five drainage holes is plenty. Holes should be 3/8" - 1/4". (You can make a bunch at once by stacking them and drilling through 10-15 at a time.)

Use finely-sifted potting soil so the seeds don't need to struggle to germinate. Pack it firmly and evenly (with the bottom of another tofu container) so the seeds are started on a flat surface and all come up at the same time. Water the soil. Don't plant too thickly and aim for an even distribution of seeds. This will make it easier to tease them apart and transplant them to the egg cartons later. 

Sprinkle a very light dusting of soil on top and press it down so seeds have good contact with the soil. Put the tofu containers in a tray and water from the bottom (so the moisture 'wicks' up until the first  leaves appear. Watering from the top can make the seeds spread unevenly. Don't over-water! Seeds need very little moisture to get started.

Once seedlings are about two inches tall, tease them apart and replant in the egg cartons, one plant per cell. It is important to handle seedlings by the stem, or leaf. Some of their root-hairs are almost too small to see with the naked eye and are easily damaged. (Pic: cabbage seedlings)
  
Tear the lids off the egg cartons and use them as trays under the egg cells. Strip off any labels with thick ink (they don't allow the water to drain well). Soak the egg cartons in a tub of water so they are saturated. Fill each cell with sifted, moist soil. Your seedlings will experience less shock if transplanted into moist soil. Gently water them in with a watering can or fine spray. Keep them in a shady spot for a few days while they get acclimatized. The egg cartons hold moisture while the plants' roots are developing.

We prefer to use egg cartons with no plastic-y labels or excessive printing which can interfere with proper drainage. Plain, pressed-paper egg cartons are biodegradable and compostable and the roots grow right through.

These seedlings were transplanted a few weeks before this picture was taken. Don't wait too long or the plants' roots will become entangled in the tofu containers and you risk damaging them when you transfer them to the egg cartons. On the other hand, if you try to do it when the seedlings are too small, it's much harder to work with them and their root systems may not yet be established and the plants may dry up and die between waterings.

To minimize the stress on your seedlings, do your 'potting up' in the shade or on an overcast day. Here, Donn and Chris are transplanting cabbage seedlings into tofu containers: six to a pot. Notice Chris is using a pen to make a hole to drop the little seedling into. Use this same method with the egg cartons being sure not to "J"-root the plants...All roots should be covered with soil; none sticking out.

Before planting the seedlings, we make a furrow in the soil and water it thoroughly. This means that the plants are going into wet soil (which makes them very happy) and, with each subsequent watering, the water is channeled towards the roots. 

In the picture above, the black nursery trays (behind the lettuce starts) are covering other recently transplanted lettuce. This shades them to minimize transplant-shock and discourages birds from coming in and helping themselves to spring-time 'salad'. After 4-7 days, we can usually remove the trays without a problem.

Many weeks later...

It's fun to mix colors/types of lettuce...

Lettuce heads are harvested once they reach full size. Here, a Service Learning student harvests Slo-Bolt lettuce for us to share.

Now, that's some beautiful lettuce!