A unique and viable approach to establishing local food self-reliance and building stronger communities.

Wednesday, March 22, 2023

Sprouting potatoes? What to do.


Why grow your own potatoes? Well for one thing, potatoes are one of those vegies that are good to eat organic and buying them organic can be expensive. They are a good use of garden space as a single plant can yield up to five pounds of potatoes. Also, they're fun to grow. This article will tell you how you can turn that scary tangle of sprouting potatoes under your sink, into a meal (or ten!).

Timing: Count backwards from when you wish to harvest your potatoes. Most varieties need between 17 and 19 weeks from planting to harvest. Add another two weeks for “chitting”. Chitting is a way to help the potatoes store up solar energy which makes them more likely to produce a big crop. Exposure to indirect sun hardens the sprouts so they are less likely to break. Also, the green in their skins is bitter and discourages pests from eating your seed potatoes in the ground.
This large potato was cut and allowed to dry on the exposed side before planting.

Sprout your potatoes: Potatoes must go through a natural dormancy before they can sprout again. This can be anywhere from four to six months. UNlike most crops, they are not sensitive to day-length but have an internal timing that can only be altered slightly to suit the farmer's planting cycles. If you wish to delay sprouting, keep potatoes in a cool, dry storage area. If you wish to hasten their sprouting, increase the temperature and moisture of their storage place. Layering them in damp leaves, in a tub kept in a heated part of your house will do the trick. The ideal sprout-length is about ¾ of an inch (10-15 mm). The longer they become, the more likely they are to break when you plant them.

If your potatoes have long, hairy sprouts: If your potatoes already have extensive sprouts, and the sturdy central sprout has many small root-hairs coming off the sides, it's important that you remove those, otherwise you'll get many tiny potatoes instead of a few large ones. These smaller side-sprouts also hasten the dehydration of the potato and weaken its ability to thrive. You can rub off the rootlets with your bare hands, they snap off easily. Multiple, thick sprouts are fine; just get rid of the fine hairs.

Potatoes on left ave too many rootlets. Ones on right have been stripped and are ready for planting.
Best size for seed potatoes: The optimal size for seed-potatoes is the size of a hen's egg. If you have larger potatoes, cut them so they have at least three “eyes” and sufficient flesh. Don't let the freshly-cut sides of potatoes touch each other as this may cause them to rot. (Some browning or blackening is normal for potatoes as they "skin over".) 
 
These are a good size for planting. Note the greenish hue from "chitting".

Chitting your potatoes: You can chit potatoes in your house near a window, or on a covered porch, or in a greenhouse (under a table). Don't put them in direct sunlight and, if there's danger of frost, cover them with a towel or cloth at night or bring them inside. After they have "greened up' a bit, and any cut parts have sealed over, they are ready to plant. 
 
Here are potatoes on a covered porch where they get indirect light.
Green potatoes are mildly poisonous so don't eat them after chitting.

If you have chitted your potatoes and its still too early to plant (the ground is too soggy or there's still snow on the ground) you can store them in a cardboard box or plastic tub, layered between leaves from last fall. You can also use straw. Or follow this link to an innovative way to extend the growing season of your potatoes. Link. We haven't tried this but it seems like it would work.

Some of our 2009 harvest, with seed potatoes stored in a paper sack (on the right).
How many potatoes should you plant? Depending on the variety, you can get five or more pounds of potatoes for each one you plant. You'll need about a foot between each plant in your garden and potatoes like lots of sun and loose, sandy soil. 

Links to our other potato blogs, go to:

"Chitting" Potatoes
How to Plant Potatoes 
Planting Potatoes in Clay Soil

Sunday, March 12, 2023

Spring has sprung! Sharing Gardens update

Hello friends and family of the Sharing Gardens - though we've had two brief snow storms since our last update, each accumulating about 2" of the white stuff, spring is definitely in the air! Temperatures are consistently reaching the low-to mid-50's in the day and rarely dipping much below freezing at night. Soon we'll turn the water back on to the garden spigots and give our two main greenhouses a thorough soaking, including the paths, and begin the cycle again of generating compost right in our paths! (LINK-How we grow...Veganic Community-based gardening)

Before we give you our latest garden-related links, you might enjoy watching this short video of a joyous, sweet song performed by the Masaka Kids Afrikana - I Look to You-LINK. Guaranteed to make you smile!

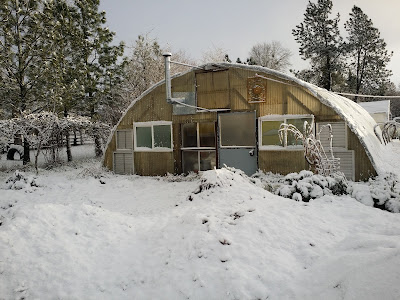
Early spring snow, soaking the ground.
In our planting zone (Willamette Valley, Oregon, USDA zone 7b), early March is a time of completing the pruning of fruit and nut trees and the pruning and care of other perennials (before warmer temps cause the sap to begin to rise). We continue to start seedlings both on heat-mats, and directly in the raised-beds in our greenhouses.

Though this picture was taken in 2022, it shows our 48 grape vines after pruning. LINK - Great video on Pruning Table Grapes.
Here are our most recent garden-related posts:

Growing your own celery is not difficult, it just takes a lot of time to get the celery plants started! (Their roots are very slow to develop). But once they do you can have cut-and-come-again celery that extends through the main growing season, and in a greenhouse, right through to mid-winter! LINK

Growing Lettuce from seed (with general tips about starting seedlings at home).

Great news for the Monarch butterflies in southern California! After a nerve-wrackingly low winter count of nesting Monarchs in 2021 (only 2,000), they seem to be bouncing back! (250,000 in 2022 and 335,479 in 2023). Even if you live too far north to help the Monarchs (there are no consistent sightings north of Portland Oregon), planting milkweed will still benefit other pollinators. They are gorgeous, stately plants and smell divine! Here's how to grow milkweeds: LINK.

Adri and Kaylynn holding up Showy Milkweed seedlings they helped grow.
In our last newsletter, we included a link to a video about a small town in NZ that came together during the lock-downs to collectively make sure all its members stayed fed with healthy food by, among other things, working as volunteers to create and maintain garden-plots for single-parent/low-income families. Any food that the families couldn't eat themselves was harvested and prepared into healthy meals at a small cafe/community-center. This hub of community also became the site for craft-projects and the sharing of practical life-skills such as sewing and simple carpentry to create useful products sold to raise money for the project to continue. 

We've received numerous appreciative comments for sharing the link. So, in case you missed the LINK in our last newsletter, here it is again.

And, in case this newsletter was forwarded by a friend, or you've just stumbled on our website for the first time and you would like to be added to our list to receive future newsletters, send us an email at the Sharing Gardens: shareinjoy AT gmail.com "Bee" well!  Chris and Llyn

Saturday, March 4, 2023

How to Grow Your Own Celery

Though growing celery takes a little patience at first (the seeds are very slow to germinate), it is not a difficult plant to grow and the flavor and crispness of home-grown celery makes it well worth setting aside a little corner of ones garden for this delicious and health-enhancing plant.

This post covers:

  • How to germinate the seed
  • Transplanting/optimal soil conditions
  • Watering
  • "Cut and come again" - celery beyond the first cutting
  • Nutritional content of celery and why to only eat it organically grown 

How to germinate the seed:  Most gardeners have a favorite way of germinating seeds but we'll just share what works for us and you can adapt it to your own preferences. 

Celery seed is very slow to germinate. Seeds can take 2-3 weeks to show their first leaves and the plants are not big enough to be planted in the ground for at least two months after that. Here in the Pacific NW, USA (USDA zone 7b) we start our celery in mid-February and they're usually ready to go into the ground by late April or early May. Don't worry if you've missed that planting schedule; celery can be started all through the spring. 

Celery seed is very slow  to germinate. Celery seedlings (left) over 1 month old. Lettuce (right) approx. 3 weeks old.
Our favorite variety that we grow is called "Utah". It's an heirloom/open-pollinated type so you can save your own seed. One plant will give you enough seed for years of future planting, plenty to use in cooking and to share with other gardeners.

One celery plant starting to flower. One celery plant will yield thousands of seeds!
For starting the seeds, we use tofu-containers with holes drilled in the bottom for drainage (see pic above), on heat mats in our greenhouse. We use a finely-sifted, well-draining potting mix that is not too rich. At this early stage, too much nitrogen can cause an algae-film to grow on the surface of your soil and lead to stem-rot in the plants. Moisten the soil before planting.

Being vegetarian, we eat a lot of tofu! With holes drilled in the bottom for drainage, they make excellent pots for germinating seeds.
Celery seeds are tiny and it can be a challenge not to sow them too thickly. Ideally you want about 1/4" between each seed. Put some seed in the palm of one hand and take a small pinch of seeds in the other hand. If you hold the seeds about 6" above your pot and drop them slowly, they will tend to spread out evenly as they fall. Use only the thinnest covering of finely sifted soil to lightly cover the seeds (or rinsed sand works too - be sure the sand you use doesn't have salts on it if you collected it yourself). Gently press the surface of the soil so the seeds below have good contact.

A good rule of thumb is to only cover seeds with soil twice as deep as the seed is thick. So, a millimeter-sized seed, would be planted approximately 2 mm's deep. 

They will germinate best with some bottom-heat from a heat mat, or to be kept indoors until the seedlings pop up above ground but as soon as the green leaves appear they need sunlight or a grow-lamp. Keep the soil moist (but don't over water!) by bottom-watering (in a shallow dish) or with a plant-mister as too much water can kill the tiny seedlings.

The seedlings will develop an extensive root-system first which can take many weeks. Don't give up on them! 

Transplanting/optimal soil conditions: Our celery seedlings go through two transplanting processes. First, once the root-system has developed and the plants are about 1/4 - 3/8" tall, we carefully tease them apart and give them each their own pot. Jumbo six-packs work fine. We have also used the tofu containers mentioned above (six to a container). These work well if you'll be able to do the next phase of transplanting as soon as the roots fill the soil. The jumbo six-packs extend this time a little bit as they hold more soil.

Transplanting tiny seedlings...

Celery is a heavy-feeder and the soil you transplant into should be well-draining and relatively high in nitrogen and minerals.

Allow the seedlings to grow for about two months or till they have a dense root system and healthy greens. (Celery pictured to the left still needs another month or so to grow. The roots are well-developed but they'll do better with more greens.) Our first transplants go into raised beds in our grow-tunnels (greenhouses) but a few weeks later, a second crop can be planted outside. Celery doesn't mind cool weather but it doesn't want a hard freeze, and, though you want to keep its soil moist, celery doesn't like soggy, wet feet (standing water).

Celery naturally grows flat on the ground (like a starfish - if seen from above). To get upright bunches (like you buy from a market) it must either be grown close together in a block, or in collars. In the first few years we grew celery, we used milk cartons and large soy-milk containers to keep the celery growing upright (see pics). The collars blocked the sun from getting to the celery and hence "blanched" it (kept it from getting too dark-green or tough). But we always had problems with slugs which found the collars to be a perfect habitat. For the last several years we've simply grown the celery close-enough together so each plant holds the others up that are around it. Spacing them about 8" apart seems to be the ideal distance. To use this method (without collars), plant them in a block or square (not a single row). They'll grow fine in a single row, they just won't grow upright and may be darker green and a little more fibrous.

We used to use milk cartons (held in place with bamboo stakes in two corners) to keep celery upright - it tends to flop flat - and to blanch it (direct sun makes celery darker green and more fibrous) but the collars proved to be ideal slug habitat.

Now we plant the celery in "blocks" (not rows), 8" apart, and the plants hold each other upright. They're not quite as blanched as with the collars but it takes less time and we don't have problems with slugs or snails.
Watering
: Celery plants are approximately 95% water so they appreciate consistent, deep watering. In the beginning, after they're first transplanted in the ground, they'll need to be watered more frequently but not as deep. Later, it's better to water less frequently but more deeply which encourages the roots to reach down into the soil and pull up the water and minerals from below. Shallow watering creates a shallow root system which is much less tolerant to fluctuations in air-temperature and soil wetness.

Late winter celery in our greenhouse. This has been harvested once and grown again.
"Cut and come again" - celery beyond the first cutting: If you are careful about harvesting, celery will re-sprout from its roots. We cut just above the point at which all the stalks are still joined to the roots. The stalks will not be joined at the root (like you buy it in the store) but this gives the roots the best chance of re-sprouting. Keep the plant watered after harvesting to assist it in putting on new growth. This cut-and-come-again celery in the raised beds of our greenhouses has frequently survived through the winter, providing flavorful, mineral-rich stalks to harvest the following, early spring. Sometimes this second-growth celery is a bit more fibrous but it's still delicious and the fibers won't be a problem if you chop the celery finely.

Second-cutting of celery is often more coarse but also more flavorful. Chop finely to use in soups. "Mmm, good!"
The leaves of celery are typically removed before the bunches are sold in a market but they are delicious, chopped finely in soup or salads. They can also be dehydrated and used for seasoning for when you don't have access to the fresh plants.

Nutritional content of celery: Celery is high in water and fiber-content and very low in calories. Since celery is mostly made of water (almost 95%), it is not particularly high in any one vitamin or mineral. Nevertheless, celery is a good source of vitamin K, with one cup containing about 30% of the recommended daily intake, according to the University of Michigan. Celery can also help you get enough folate, potassium, fiber and the micronutrient molybdenum. It contains small amounts of vitamin C, vitamin A and some B vitamins. "Celery is naturally low in calories, carbohydrates, fat and cholesterol," (Read full post here: Celery: Health benefits & nutrition facts)

Always grow or buy organically grown celery. Having such a high water-content, it absorbs and retains pesticides and herbicides.
If you're not able to grow your own celery, always buy it organically grown. Because of its high-water content, it absorbs lots of whatever herbicides or pesticides that are used in growing it. It consistently shows up in the "Dirty Dozen" of fruits and veggies you should always buy from an organic source. (For more info, read this post: Which Fruits and Vegetables to Always Buy Organic-LINK)

As people tour our gardens, they commonly remark that they've never grown their own celery. We hope this post has helped demystify the process and we wish you much success with your growing.

Wednesday, March 1, 2023

Starting Tomatoes from Seed


Transplanting tomato starts (tofu containers with holes drilled in bottom re-purposed for seed-starting).
Here in the Pacific NW, it's time to start tomatoes from seed. Most varieties need 6-8 weeks to grow large enough and sturdy enough to be transplanted into garden beds. Since our last risk of frost is around mid-May, early to mid March is the time to start the seeds. And, if you're like us and grow most/all of our tomatoes in greenhouses, they can be transplanted from their pots even sooner.
 
Tomatoes are warmth-loving plants needing to germinate at around 70-75 degrees so they need to be started indoors to thrive. We germinate ours on a heat-mat specifically designed for this purpose. Once the seeds are up, they need full sun to keep from getting pale and leggy. A greenhouse is best, as long as you don't get freezing temps or have a heat source on cold nights. If you don't have a greenhouse, a grow-light will work, or a south-facing window. Keep rotating plants so they grow straight up (not towards the window).

Lettuce: From Seed to Feed - Part 1: Planting

Red Iceberg Lettuce - a summer rose!
Here in the Pacific NW, we start our lettuce seed in a greenhouse in late February and then transplant the starts out in April or May when conditions allow. We're vegetarians and end up with a lot of those white, plastic, square tofu containers. We've found they make great tubs to start small seedlings. We drill holes in the bottom for drainage, fill with a good potting mix (using the bottom of another tofu tub to pack the soil firmly and make a flat surface for the seeds).

After misting the soil so it is good and damp, we sprinkle the lettuce seeds with our finger-tips trying to have a 100 or so seeds per tofu tub.  Lastly we gently sprinkle a thin lay of cover soil over the seeds and lightly mist to settle the seeds. They must be kept moist but not overly wet or the seeds and starts may rot. Lettuce seed germinates best in a cool soil so don't put it on a heat mat or under a lamp to get it to germinate.

Lettuce seedlings in a tofu container. Using a pen to make holes for transplants.
When the seedlings are about 1/2" - 1" (2 cm) high, they are ready for transplanting. We put ours in regular or "jumbo" six-packs. We use a basic, organic potting soil and add our own fertilizer. To each wheelbarrow of soil we add about two cups of all-purpose organic fertilizer and about a half-gallon of sifted rabbit manure . When germinating tiny seeds (such as lettuce), we sift the soil before adding amendments so the seedlings don't have to push past un-composted bits of bark or wood-chips in the soil. For transplanting, we don't bother to sift the soil.

Transplanting seedlings
For the Sharing Gardens, where we might grow 1,000 or more lettuce plants per season, transplanting is done in large batches. Being systematic in the nursery will save you time and materials and you will have much better results. Have labels ready so you keep track of the varieties you are transplanting. Fill a flat of six-packs and mist it with water and soak the seedlings too. Wet soil is less shocking to transplanted roots than dry. Cupping your hand over the whole tofu-tub of seedlings, flip it over and tap the bottom, catching the whole clump of soil and seedlings in your hand. Gently flip it back over and place it on a tray to catch the loose soil as it drops off.

Seedlings "hardening-off".
Using your finger. a stick or some other object, make a generous hole in each of the cells of the six-packs. Pull off a clump of seedlings and, holding them by their leaves, tease apart a single plant with its roots. On a cool, overcast day you can lay a large number of the seedlings alongside their holes before dropping them in and squeezing the soil around them. If the day is hot or the sun is strong, work in smaller batches so the seedlings don't get shocked. It is very important that all the roots go down into the soil and are covered. If they stick out from the surface, this is called 'J-rooting' and  will often kill the plants as they dry out too easily. This is why you want to dig a generously-sized hole so the rootlets don't catch on the sides as you lower them in. after pressing the soil in around each seedling, water them in gently to settle the soil. Label the tray and move onto the next.

Transplanting peas and lettuce
Depending on warmth and sunlight, and the size of the six-packs you use, your lettuce will be ready to plant in the soil in six to ten weeks. If you stagger your plantings it will mean your lettuce doesn't all come ripe at once. Ideally you wait until the root ball has filled the six-pack cell enough to hold the soil as you pop it out, without being totally root-bound (roots coming through the bottom of the six-pack). A week or two before you transplant into your garden, bring the starts outside and begin "hardening them off". Put them where they will get plenty of sun but not too much wind. They will withstand a light frost but if it is going to get very cold, or doesn't warm up in the day, bring them back into the greenhouse till conditions improve. During this hardening-off period, prepare garden beds so they are ready to receive transplants. In our "deep-mulch/minimal till" gardens, we pull a row of mulch over to the adjacent path (with a pitchfork) and, with a trowel dig a small hole just the size of the lettuce's root-ball. This leaves worm holes intact and lettuce seems to thrive without any roto-tilling needed.

Several weeks after transplanting. Picking individual lettuce leaves for salad.
Here in our area, slugs can be a real problem in the spring. Follow this link for ideas on how to re-use milk cartons or soy-milk containers to thwart off their feasting. Re-Purposing Things We don't find that additional fertilizing is necessary for lettuce plants. They receive enough nutrients from the soil. We hold off on mulching them because we want the sun to warm up and dry out the soil and mulch provides habitat for the slugs. Sometimes, after the lettuce is well established and the soil is warmed up, we mulch with a few inches of grass clippings around our plants. Let the clippings dry out for a few days on a tarp or in a bin. Fresh clippings, if piled thickly, can heat up considerably and burn your plants.

Chris Burns with beautiful lettuce harvest! 2011
We plant our lettuce spaced about 6" - 8" (12 - 15 cm) apart. We harvest them intermittently giving the remaining lettuce room to grow. In the early stages, before the heads are fully formed, we harvest one to three leaves off each plant, rather than clipping whole heads. As the heads become full size we harvest by cutting them off at the root with a paring knife, leaving the roots in the ground to feed the worms.

Fall Crops: Give yourself 45 - 60 days (before hard freezing) to grow your fall crops of lettuce. You can assist your lettuce in germinating if you begin the process in a shaded area so the soil isn't too warm. Once seedlings come up, they will need sunlight to grow but do this outside of the greenhouse so they don't get too hot. Heat triggers the plants to "bolt" (go to seed) even when the plants are very young.

Favorite varieties: Everyone who eats out of our gardens seems to prefer green lettuce to red, or at least to have some green to mix in with the red. (This even includes the bugs who seem to devour the green lettuce much more voraciously!) Our recipients also seem to prefer head lettuce to the "leaf" lettuce. We don't know why this is (maybe just habit...) but we take this into consideration when we plant out our gardens. There are hundreds of varieties of lettuce to choose from. The most popular ones we grew this year were:

Buttercrunch
Chartwell's Romaine
Green and Red Iceberg (home-grown Iceberg lettuce is much more nutritious than store-bought).
Four Seasons (a red Romaine-type lettuce)

LINK: How to Save Your Own Lettuce Seed

The Sharing Gardens is a non-profit and tax-exempt organization. We exist entirely through donations. If you have found benefit from our project or our site, please consider making a donation through PayPal. (Click button below.)