A unique and viable approach to establishing local food self-reliance and building stronger communities.

Saturday, August 24, 2024

Why We Grow and Eat "Organic" Food

Organics - Better for Health!
August 2024: We've been saying it for years: the key to health for people and the planet is to switch to growing and eating organically grown foods. Finally, it seems that the connection between ultra-processed foods (which are heavily subsidized by the federal government) and chronic diseases. Here is a short (13 minute) video which summarizes this perspective. LINK
 
(The following article was originally posted several years ago...Perhaps its time has come!) If you've been wanting to increase the amount of organically grown foods in your diet this post is for you! Here are many reasons including the beneficial effects on the environment, the people who grow and harvest our food, the animals raised to provide food and your own health. Thank you for taking this important step in your life.

Chris and I eat almost exclusively organically grown foods when we're at home. At 73 and 60 years old respectively(Feb. 2023), we are both very healthy. We take no prescription medications and, in fact had a bottle of aspirin pass it's expiration date in our medicine cabinet once because we were too slow in using it for occasional muscle soreness or headaches! We each have had three colds in the last 16 years but no other illnesses that caused us to be bed-ridden for even a day. Our food is our medicine (along with other healthy lifestyle habits including meditation, stretching and exercise practices and a generous lifestyle geared towards service) and we feel strongly that a societal shift towards an organic, whole foods, plant-based diet would have significant positive effects both on people's personal health and the health of the natural environment as well.
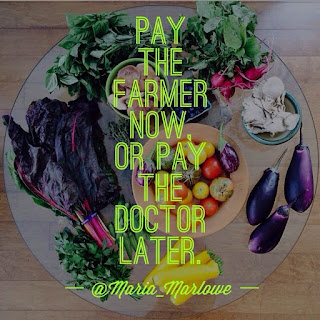
Image credit: Maria-Marlowe
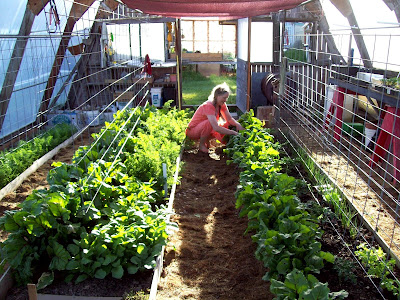
We are at an advantage over most people as our large gardens provide a high percentage of the foods we eat but for many years we have made it a priority to let our food-budget reflect our values and we only buy groceries that are organically grown. The only times we don't eat organic are when we eat out at restaurants or are visiting friends, which amounts to two or three times per month.

This post offers an overview of what we feel to be the most important reasons to shift to an organic diet. For those readers who have the financial means to make this shift entirely, we encourage you to jump into an organic life-style whole-heartedly. We also encourage you to cultivate relationships with local farmers through shopping at farmer's markets and co-ops that feature local, organic foods or joining a CSA (Community Supported Agriculture). See also: Seven Tips for Shopping at a Farmer's Market

We realize that, for many people who are living close to the edge financially, that committing to buying all your groceries organically-grown may be impossible at this time. If that is the case, consider making smaller incremental changes such as committing to only buying organically and humanely produced animal products (where farm chemicals become most concentrated) or only buying organic "treat foods" (whatever that means for you). Their higher prices may encourage you to eat less of these items which will be better for your own health and  for the health of the planet.

Another option to increase your intake of organic garden-produce is to start your own garden, or start or join a community-garden. LINK: So, you want to start a Sharing Garden.

We like to remind ourselves as we adopt new lifestyle choices that "it's a direction, not perfection." Be gentle on yourself as you make new changes and, if sometimes you decide to eat something on your "no-no list", do it consciously, do it with joy and then re-commit to following your chosen dietary guidelines once again. Happy eating!

Image credit: Enki quotes.com
So, here are some of the top reasons we feel it is important to eat organically grown foods.

Healthier for you: Ingesting farm chemical residues isn't good for your health. Many of these chemicals can build up in one's tissues over time so, even though we may only eat small amounts with each meal, their accumulated amounts can be significant over a life-time. Also, children tend to be more susceptible to environmental toxins as they are building new tissues at a faster rate than adults.  LINK-Pesticide Action Network
Any farmer who grows "organically" may not use herbicides, pesticides or fungicides - unless they have been approved by the organic-certification agencies.
Slow-grown food is more nutrient-dense.
More nutrient dense? The truth is, most organic-farmers struggle under the same competitive conditions as farmers who grow using conventional practices. This means, they need to invest the least amount of money in fertilizers and other soil amendments, and grow their produce as fast as possible, to get it to market ahead of their competitors to make the most profit. These practices lead to more "water-weight" and less nutrient-dense foods. This means that the vitamin/mineral content may not vary much between organic and conventional farmers.  On the other hand, some studies suggest that, on average, organically-grown produce is consistently more nutrient-dense and lower in pesticides and heavy metals. Nutrient Levels in Organic vs. Conventional Foods

This is why it is important to know your farmer so you can confirm that their food is slow-grown and that the farmers are replacing the minerals that get depleted in their soil from harvesting crops.
Adding compost-tea to our gardens is one way we replace many of the nutrients that are depleted through harvesting.
GMO versus organically-grown:  There is still debate about whether foods produced from Genetically Modified Organisms (GMO's) are a health risk to humans. We are strongly opposed to them because of the compelling research pointing to the possibility that eating GM plants, or livestock raised on GMO feed can lead to leaky-gut syndrome and a whole slew of health problems including severe food-allergies, learning disabilities and autism-spectrum disorders in children. Autism and GMO's LINK Institute for Responsible Technology-a GMO watchdog group. Genetically Modified plants and animals have the potential of interbreeding with plants and animals that were not genetically modified, with unforeseen consequences. Some GM plants (corn and soy) are specifically bred to be resistant to Round-up and other herbicides meaning large amounts of these chemicals can be used to grow them. This leads to well-documented cases of super-weeds that have become resistant to herbicides and require ever stronger chemicals to keep them in check. LINK: The Dangers of Round-up Ready Foods, LINK-GMO Health Risks  Also, GM corn and soy are used extensively in livestock-feed so you can imagine how these farm-chemicals concentrate in their tissues.
We feel strongly that it is important to avoid eating any genetically modified plants. We feel it is especially important to avoid eating animal-products (meat, dairy, eggs) from animals fed on GM feed.
Sharing Gardens - 2019
But what about just eating non-GM foods? Well yes, this is a step in the right direction but just because something is non-GMO does not mean that it's grown without farm chemicals. Industrialized farming uses plenty of chemicals in growing the food. Did you know that it is also a legal practice for farmers to use Round-up as a desiccant (which causes withering and drying in plant tissues) to artificially dry crops if conditions are too wet for the crops to fully ripen in the field? LINK-Wikipedia, LINK-EcoWatch.
By definition, organic farmers are not allowed to grow Genetically Modified crops, or feed them to their livestock.
Better for the environment. Anyone following the news knows that our environment is under attack from all sides. Industrial farming is one of the biggest culprits.

Pollinators are under siege from the practices of growing "mono-crops" (all one variety) for thousands of acres, offering no variety in their diet of pollen, and many farm-chemicals are damaging to their health as well. LINK - Why growing sunflowers is great for bees.

Honey-bee on tansy. We let some weeds flower in our garden intentionally as they provide important pollen-food for beneficial insects. Here's some good news: Grassroots bee petition in Bavaria forces greener farming practices: 
Soil health: Industrial farming - through over-tilling and depleting soil of organic matter makes soils void of all life and destroys the structure of the soil itself which no amount of added fertilizers and chemicals can restore.
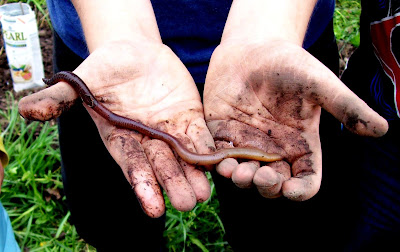
Healthy soil means healthy soil-organisms. Eight-year old, Ricardo holds an earthworm found in our gardens.
Industrial farming is a major source of water-pollution. Industrial farming has negative effects on the world's water for many reasons. Here are a few: Heavy Metals build-up; Algae Blooms, Dead-zones and Acidification; Nitrates; Pathogens and Over-use of water reducing water-levels in our aquifers. (LINK-How Industrial Agriculture Effects Our Water)

Many bird species have a hard time finding enough insects to feed their young. Farm chemicals tend to concentrate in the tissues of animals, the higher-up you go in the food chain as Rachel Carson so famously proved in her landmark book from the 1960's titled Silent Spring.

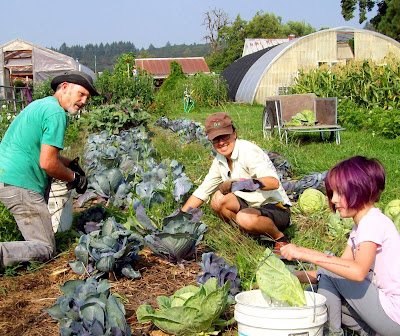
Thorin, Eliza and Adri harvest cabbage, 2018.
Be aware too, that this principle of chemicals concentrating in tissues applies to foods raised for human consumption too. The accumulation of these chemicals in our own bodies will therefore be less with a plant-based diet. The more meat, dairy and eggs one eats, that are not organically-raised, the higher concentrations people have in their bodies of these chemicals. Bear in mind too that the quality of life for livestock animals grown organically is more humane as well.
Organic farming practices keep our air, water and soil healthier and can even contribute to the increase of viable habitat for wild plant and animal species.
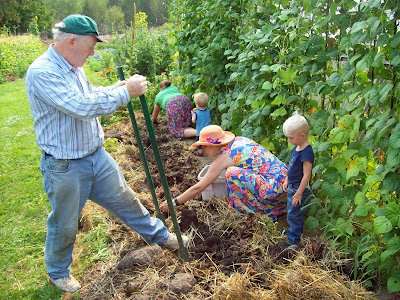
Organic farming is better for the farmers and farm-workers who grow our food. Sharing Gardens volunteers digging potatoes 2018.
Healthier for the farmers and farm-workers: When we use our purchasing power to make a statement about our values, we are directly contributing to healthier lifestyles for everyone involved in the food-growing community. LINK - Agricultural Chemicals and Human Health
In this complex world of competing dietary studies which often offer contradictory results it can be difficult to know who to trust and which dietary practices will be best for your health and the health of the environment on which every living things depends.

If you have been feeling on the fence about whether to make the commitment to eating more organically-grown foods, we hope this post has helped you make that shift. Just remember that wise saying, "You can either pay your farmer now, or pay your doctor later." We think this is good advice.

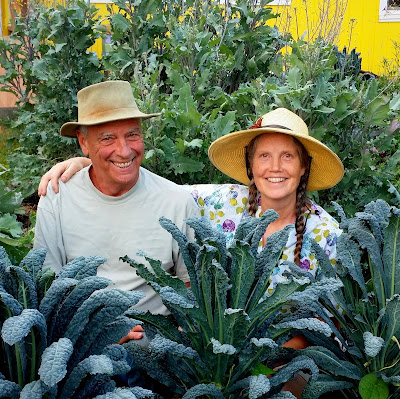
Get to know your farmers! Chris and Llyn in the Sharing Gardens, your friendly, neighborhood "farm-acists".


Bella loves kale!
Other relevant LINKS:

Organic diet intervention significantly reduces urinary pesticide levels in U.S. children and adults - Science Direct 

What the pesticides in our urine tell us about organic food - The Guardian

The States in America That Use the Most (and Least) Glyphosate - Zero Hedge

What's in standard 'fast food'?


Sunday, August 4, 2024

Saving and Storing Kale Seed

Kale is a powerhouse of nutrition and in climates like the Pacific NW, where we live, it's very easy to grow. (See: No-Fail Kale: The Powerful Health-Benefits of Kale and How to Grow It).  It is also relatively easy to save seed from too. Here is a post about the methods we use to save kale seed.

One of the pleasures of growing your own food from seeds is to begin to save your own seeds. With most varieties, it's not difficult and the seeds you save yourself will naturally select/adapt to be more perfectly suited to your local climate and conditions. Saving seeds also contributes to having a greater sense of local food-security in case there ever comes a time when seeds are not distributed over long distances, or there is a seed-crop failure in another part of the country.

Eat your kale for healthy skin, hair, bones and teeth!

We typically grow two crops of kale per year: the first one we start in February - either in pots, or directly sown into our greenhouse raised-beds. LINK: Starting Seedlings Directly in Greenhouse Raised Beds

The second batch gets started in early July and transplanted to outside beds once the seedlings are big enough; or we scatter the seed over a whole outside bed, creating a lush mat that we can eat from through all but the harshest of winters and then roto-till in, in the spring as a cover crop (after harvesting the spring flowers/raab).

Starting seeds: We often start seeds in plastic tofu-containers with holes drilled in the bottom. We like re-purposing plastic so it isn't just sent to the landfill. Being vegetarian, we eat a lot of tofu (!) and so generate a lot of these containers. Be sure to drill 1/4" holes for drainage! They will last for many seasons.

To use this method, fill the containers mostly full of soil and press the soil down evenly with the bottom of another container. After sowing seeds, cover with scant, even layer of soil. Keep moist but don't over-water.

The white containers above are tofu-containers we have re-purposed for seed-starting. These seedlings pictured above are lettuce plants (to show spacing of seeds).   

Once the seedlings are about an inch tall, re-pot them into jumbo six-packs, or (we use) the same tofu-containers, with six seedlings per container. The tofu-containers use less soil than the six-packs and it's very easy to break apart the roots of the six plants when it's time to plant them in the ground.

Choose a location that gets plenty of sun and has well-drained fertile soil. Since the part of the plant you are harvesting to eat is the green leaves, this is a big clue that kale loves nitrogen. But don't over-fertilize. This will make the plants grow too fast, have weak cell-walls and be more susceptible to diseases and insects (such as aphids).

Plant them 18" - 24" apart. If slugs are a big issue in your area, sprinkle iron phosphate granules around the plants and replenish if it's been consumed or gets very wet (brand-name "Sluggo").

If you have lots of seed, you can broadcast it over a whole row and harvest the leaves in bunches, cut with a knife (see pics below)

Here, Chris is harvesting kale that was sown directly in a greenhouse bed. Using a sharp knife, he cuts off whole handfuls of kale leaving the node where new leaves sprout untouched for future harvests. The leaves will continue to re-grow for many, many months.

Kale and fava beans as a cover crop (planted in Sept., pictured in late October). Kale survived the winter; favas did not (froze). We ate kale all winter and tilled the kale into the soil in the spring as a 'green manure' (for fertility).

Saving seed: The best time to save seed is in the spring, from plants that have wintered-over but we've also saved viable seed from the plants started in February. That latter seed ripens in the late summer.

Though we're not aware of hybrid-varieties of kale (which would mean that the seed you saved wouldn't grow "true") be sure that there are no other plants from the brassica family flowering near by, at the same time. These include (but are not limited to) broccoli, cabbage, mustard and other varieties of kale. If other brassicas are flowering at the same time, your seed may become cross-pollinated and your plants may not grow 'true'.

Broccoli is in the same family as kale (brassicas) and, if flowering at the same time, their seeds may cross.

Here is a broccoli plant going to seed. It looks almost identical to kale at this stage. You will want to stake or put a cage around your plants before they become so laden with seed that they will be in danger of toppling over. Note the little, red onion bag we tied on the plant early on to designate it as a seed-plant so no one harvested leaves from it. (Note: broccoli seed is often sold in large quantities to grow sprouts - highly nutritious.)

In order to create seed, kale will send up several flower-stalks per plant. Before they open, when they look little mini-loose broccoli heads, they are called 'raab' (pronounced 'rob'). They are tasty and highly nutritious (the flowers will be particularly 'sweet' from plants that have over-wintered as the cold causes them to 'sugar-up'). We love them lightly steamed and drizzled with olive oil, vinegar and a touch of salt. Enjoy the bounty, as soon the plants will become determined to set seed and the whole plant will become more bitter and tougher in texture. Just don't pick any raab from the plants you're going to save seed from.

If left to mature, the raab opens up into yellow flowers. Once the flowers open, the plants become more woody and less pleasant to eat (but the bees love them!).

Spring kale flowers (raab), harvested and ready for steaming. Spring raab is tender and slightly sweet and full of nutrients!

To save seed, select a plant (or plants) and don't pick off the flowers. Don't pick any more leaves to eat either. You may want to put a cage around the plant, or tie it to a stake as the flower stalks become quite heavy once they're loaded with seed. Also, if multiple people harvest from your garden, designate the plant as a seed crop with a sign, or flag. We use small, red mesh bags that onions come in and everyone who shares our gardens knows not to harvest where they see these red 'flags'.

The flowers will blossom, die back and a seed pod will form in their place. Kale gets pollinated primarily by insects so hopefully you'll see lots of them visiting the flowers.

The flowers are pollinated and become seed-pods. Each plant can produce thousands of seeds! Wait to harvest the seed-pods till they are mostly turning purplish/tan and the pods are drying out (see above).

It's important to find the right time to harvest seed. You want to be sure the seeds are ripe enough that they are fully black and pop easily out of the pods, but don't wait so long that the birds eat your seed, or the pods shatter and spread the seed onto the ground below. Regardless of your best intentions, there are always some seeds that shatter out of the pods so you can anticipate 'volunteer' seedlings to germinate in places you've let kale plants go-to-seed.  We have one place in a greenhouse that has germinated kale plants for a third season in a row since we last let plants go to seed in that spot. That's what we call a 'high-quality problem'!

When ripe, the pods will easily open by rubbing them between your fingers yielding multiple seeds in each.

Mature kale seeds. Each plant is capable of producing thousands of seeds. This is just a small fraction of those saved from one plant.
You need to have some way of catching the seeds as the pods dry and open. After clipping the ripe seed-stalks, slip them gently in a paper-sack and hang in a dry place where birds and other animals can't reach them until the pods are all dry. You can also put them upside-down in a plastic tub or bucket. We have hung them from the rafters of our garden-shed, or on a shelf above our wood-stove, or put them in the greenhouse in a tub, on a shelf, covered by screens (to keep animals from eating them).

Seeds are ready for winnowing (separating seeds and chaff) when the pods are crisp and dry and crush easily by rubbing them between your hands. If it isn't in a tub already, carefully place the stalks of seed-heads into a tub and rub the pods between your hands to shatter them and release the seeds. As each stalk is cleaned, remove it from the tub. In the end you will have a mixture of seeds and dried leaves/pods (chaff). Winnowing is described in the caption below.

Here, Chris is giving a demonstration to Rook and Cindy of winnowing bean seeds (separating the seeds from the chaff). On a lightly breezy day, or in front of an electric fan, slowly pour seeds from one container into the other so the breeze blows the chaff away and the seeds fall into the lower container. Repeat until clean.

Storing seeds: Often, after winnowing, we continue to dry the seeds on a shelf above our woodstove. It is very important that they be totally dry or they can develop mold during storage. Heat can also destroy seeds so don't dry them using intense heat conditions. Check the plastic bags, jars or bottles a week or two after you store them to check there's no mold growing. We've lost a few batches due to mold which is always a sad thing when you go to check your seeds at the beginning of the next growing season. Store seeds in a cool, dark place (or in your freezer, in an airtight container if you have the room).

Here's a LINK listing all our other posts about saving your own seed.

Delicious and nutritious, spring "greens": Toscana and Red Russian kale flanked by "Red Sails" lettuce.
  

Saving Tomato Seeds

Striped German - Heirloom tomato
One of the missions of the Sharing Gardens is to educate people about the importance of seed-saving and to offer techniques to demystify this process. Today's blog covers the practical steps necessary for saving one of the home-gardener's favorite fruits: the tomato! If you're new to seed-saving tomatoes are good to start with because of their relative simplicity.

In order to save seeds that will "grow true" and produce fruit similar to the one you saved seeds from, you must start with an "heirloom" or "open-pollinated" (OP) variety (not hybrid). Hybrid seeds are artificially created by seed companies to produce plants with unique qualities (early ripening, bug resistance etc). The problem is that they don't "breed true". If you save seed from hybrids, next year's plants may or may not be what you want. If you wish to save seeds, choose seeds or starts that say "open pollinated", OP, heirloom or non-hybrid.
 
"Heirloom" tomatoes come in all types: here are large paste-tomatoes called "Long Toms"
 
OK, so lets say you have grown some beautiful heirloom tomatoes and you're ready to save seeds. If you have more than one plant to pick from, choose the plant that is healthiest, most robust, earliest to ripen and with the largest and/or best-tasting fruit. Then, pick several fruits that are the best examples of these same qualities. If you've grown out several plants of the same variety, save seeds from multiple plants to keep  genetic diversity.
 
If there are other people who harvest from your garden
, put a twist-tie, or in some other way mark the fruit so no one picks it prematurely. We often use onion or citrus bags (plastic, stretchy netting - Left) so we can actually cover the fruit, making it clear that it's not to be picked. Let the fruit come to fullest maturity possible. It's OK even if it starts to rot a little.

Black Krim (below) and Striped German
Here are two heirloom tomato varieties we saved for seed this year (right). We saved them as beautiful examples of color, juiciness and size. That's a Black Krim on the bottom and a Striped German on the top.

In saving seed, you wish to mimic nature's process. Have you ever noticed what happens to the tomatoes left in the garden after the first frost? They turn to a slimy mush, with the fruit eventually dissolving away from the seed. In the following year, robust little volunteers emerge from where the tomato rotted. The way we mimic this process: 
Remove the stem from your chosen tomato and put it in the blender with enough water to fill a quart jar. (We have well-water which has no chlorine and I'm not sure if chlorine would be a problem so, for best results, use filtered water, without chlorine.)
Whiz it in the blender, at a low speed, just long enough to separate seeds from fruit. Don't worry about the seeds. They have a protective gel that keeps the blades from harming them. Pour them into a wide-mouth glass jar. Be sure to swirl the blender as you pour the last liquid out so no seeds are left in the bottom. 
If you're processing more than one tomato variety in a row, rinse the blender well so you don't mix seed varieties.  
Label the jar so you remember the variety of seeds you're saving.

The next step is to leave them to "rot". To minimize fruit-flies secure a piece of cheese cloth over the opening with a rubber-band or canning-jar ring. Leave them in the open jar for 4-7 days. When it's warm outside, the process will go faster. Stir them once or twice a day with a chopstick to help separate the seeds from the pulp. The pulp and non-viable seeds will form a layer at the top. The healthy seeds will sink to the bottom. Look for a nice scum to form on the top. Mold is OK. The picture below, on the left is of two varieties of tomato seeds in process. The ones on the right were just blended so no layers have formed. The ones on the left have been sitting a few days. The other picture shows the quality of the scum that has formed on the tomatoes once they are ready for the next step. Notice the bubbles which indicate a mild fermentation process.


The last step is to dry the seeds. Spoon out the scum and pour off most of the water. The viable seeds will have sunk to the bottom but be careful not to pour them out with the pulp/water. Add more (filtered/well) water, allow to settle and continue to pour off excess flesh. Repeat this process till you've removed the majority of the flesh and are left with just seeds and water (or as close to that as possible). 
 
Then pour the seeds through a fine-mesh strainer and rinse them in the strainer. Let them drip-dry and then tap them onto a piece of tin-foil, a jar-lid or other non-porous surface. We find that the lid to a plastic tub (like a yogurt container) works best as it's flexible and we can "pop" off the seeds after they've dried. Seeds will stick to paper towel or napkins. 
 
Transfer your label to the drying seeds and leave them to dry for a week or so. Place them on a table or shelf out of direct sunlight and safe from animals (we had a whole batch of seeds eaten by a mouse when we left them on a low shelf they could access). Be sure they are thoroughly dry before storage so they don't mold in the bag, envelope or jar.

Each seed-saver has his or her preference for containers to store seeds in. We use clean, small plastic bags or recycled plastic pill-bottles or other small jars. The most important thing is to keep your whole seed collection in a dry, dark environment with moderate temperatures, in air-tight containers. Avoid freezing or excessive heat. Stored well, tomato seeds can remain viable for many years.

Tomato seeds drying.