A unique and viable approach to establishing local food self-reliance and building stronger communities.

Thursday, January 2, 2025

Winter at the Sharing Gardens

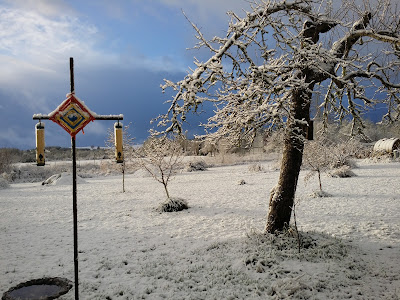
Though the Sharing Gardens doesn't typically get a lot of snow, we did get about 5" in late December 2021. Here are our bird feeders overlooking our fruit and nut orchards to the south of our farmhouse.

We're re-posting this winter update from winter 2024 as it has relevant links and info about winter tasks and projects. Enjoy!

Greetings dear friends, the worst of winter is probably over for us here in the Willamette Valley of Oregon (Zone 7b). Chris and I have had a restful time since the hubbub of fall harvests, seed and food preservation and garden-clean-up are behind us. Here is a photo essay showing how our winters are spent in preparation for spring's promise in the new year.

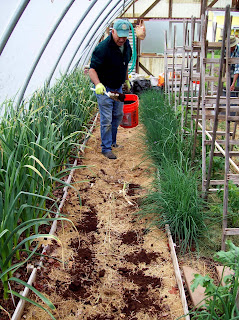
Late fall: Sandra sifts the compost that the worms produce in our paths while Chris harvests it. To learn more about creating soil-fertility using local materials, CLICK HERE.

Winter is the time when we begin adding wood-ash and coffee-grounds to our greenhouse beds and paths. The wood-ash is from our wood-stove (our only source of heat). Coffee grounds are a 'waste product' that our friend John Kinsey collects weekly from a coffee-shop. Worms love them! LINK-Coffee grounds and Wood-ash for fertility

Spreading coffee.
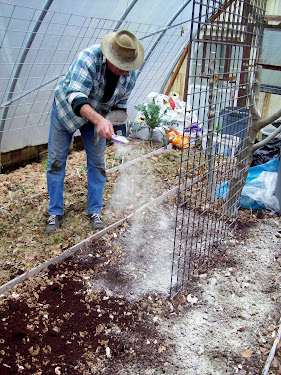
Spreading ashes.
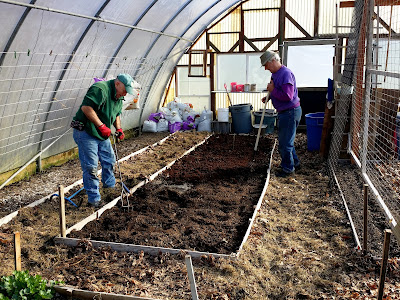
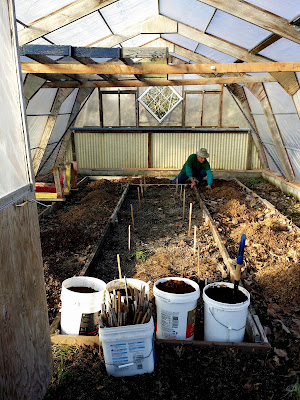
Donn and Chris loosen the soil in our greenhouse raised-beds and dig in the ashes, coffee-grounds and worm-compost so beds are ready for spring planting.

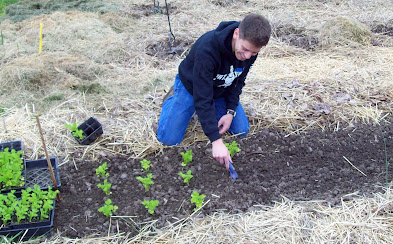
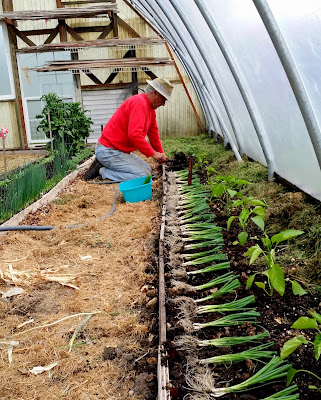
It's early February and we already have planted carrots, beets, spinach and lettuce directly in our greenhouse beds. This picture is from 2021 but shows how we dig up onions that have over-wintered and replant them for green-onions we'll eat in early spring.

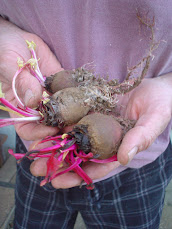
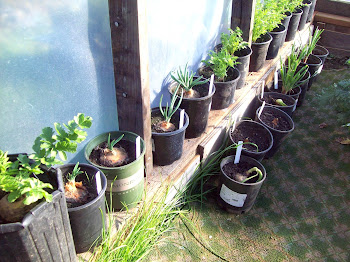
Now is the time to re-plant bulb/root crops to grow seed crops. Beets, carrots and onions are biennials. This means they produce seeds in their second year and then die. Because our ground can be so wet and cold through the winter, we often dig up these root crops and store them in a plastic bag or clam-shell container with dried leaves or straw so they stay moist (but not too moist) till we're ready to replant them. Below are pictures of beets (left) that have wintered over and are beginning to sprout leaves and root hairs. These we plant into pots with soil. On the right is a picture of a row of potted root crops that are developing enough roots and sprouts to then be planted again in the ground so they can mature and set seeds. Note: seed-saving can only be done with heirloom/non-hybrid varieties.


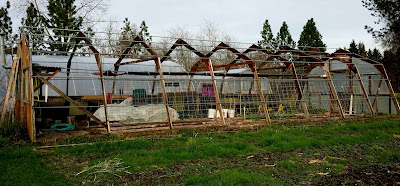
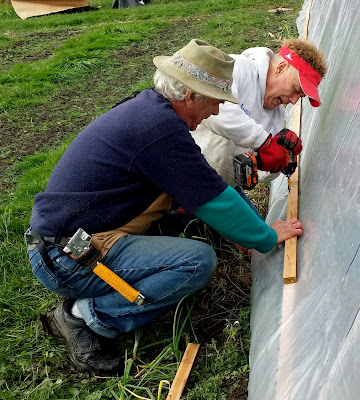
Our oldest greenhouse, the Ark, was ready for re-skinning this winter. The special UV-protected greenhouse plastic is guaranteed for four years but this skin actually lasted seven! We timed the removal of the skin for a few days that were forecast to be mild and with minimal wind. Donn came by after we got the skin off and the three of us got the new one secured in place with lathe in just a few short hours. LINK: Carport-Frame Greenhouse Design

The Ark with no "skin".
Chris and Donn screw down strips of cedar lathe.
That's the newly covered Ark on the left and last year's greenhouse project, The Phoenix, on the right.

The Phoenix: spreading mulch and coffee (buckets in foreground) for a new season.

Winter is the time for organizing our indoor spaces, sorting seeds and labels, pruning perennials and planting new ones...

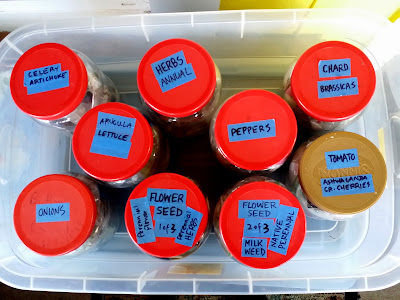
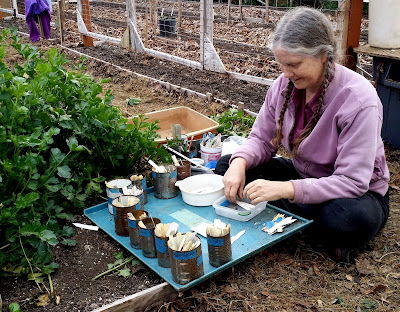
After sorting seeds into categories, we put them in zip-lock bags (freezer bags) inside tightly fitting old peanut-butter jars (so they won't get dehydrated) and put them in our chest-freezer.

Llyn, sorting plant labels.

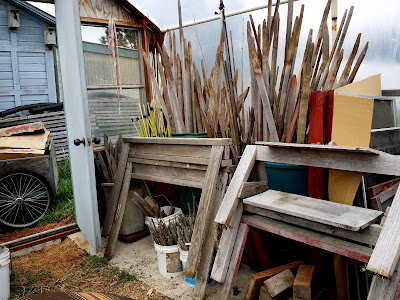
Keeping our garden supplies sorted and stored out of the weather...

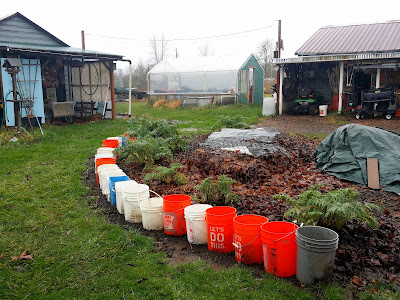
Since we shut down our irrigation lines in the winter, we collect rain-water in buckets so we don't have to turn the lines back on till springtime.

Winter is time to care for our perennial plants: trees, shrubs, vines and flowers. Some need pruning. Some need mulching and our new ones need holes dug so they can live in their 'forever homes'.

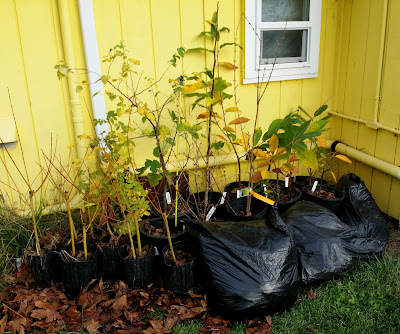
Potted perennials protected from cold, north winds behind the house and under bags of leaves for insulation. These will get planted in the ground soon.
We're just days away from beginning to plant seeds in pots for next season's crops. 

May this be a fruitful and abundant year!


Other Posts you might be interested in:

Planting Cool-weather crops:
Reprinted from February 2021: Since we have several greenhouses, February is the time for starting the cool-loving crops like lettuce, cabbage, kale, broccoli, collards, celery, parsley, onions and peas. Here is a post with links to some previously written articles about how to start some of these crops in your own garden.

No-Fail Kale: Growing Kale and Saving Seed


How to Grow Your Own Celery

Though growing celery takes a little patience at first (the seeds are very slow to germinate), it is not a difficult plant to grow and the flavor and crispness of home-grown celery makes it well worth setting aside a little corner of ones garden for this delicious and health-enhancing plant.

This post covers:

  • How to germinate the seed
  • Transplanting/optimal soil conditions
  • Watering
  • "Cut and come again" - celery beyond the first cutting
  • Nutritional content of celery and why to only eat it organically grown 

How to germinate the seed:  Most gardeners have a favorite way of germinating seeds but we'll just share what works for us and you can adapt it to your own preferences. 

Celery seed is very slow to germinate. Seeds can take 2-3 weeks to show their first leaves and the plants are not big enough to be planted in the ground for at least two months after that. Here in the Pacific NW, USA (USDA zone 7b) we start our celery in mid-February and they're usually ready to go into the ground by late April or early May. Don't worry if you've missed that planting schedule; celery can be started all through the spring. 
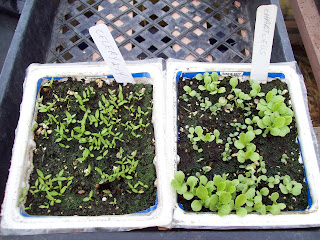
Celery seed is very slow  to germinate. Celery seedlings (left) over 1 month old. Lettuce (right) approx. 3 weeks old.
Our favorite variety that we grow is called "Utah". It's an heirloom/open-pollinated type so you can save your own seed. One plant will give you enough seed for years of future planting, plenty to use in cooking and to share with other gardeners.

One celery plant starting to flower. One celery plant will yield thousands of seeds!
For starting the seeds, we use tofu-containers with holes drilled in the bottom for drainage (see pic above), on heat mats in our greenhouse. We use a finely-sifted, well-draining potting mix that is not too rich. At this early stage, too much nitrogen can cause an algae-film to grow on the surface of your soil and lead to stem-rot in the plants. Moisten the soil before planting.
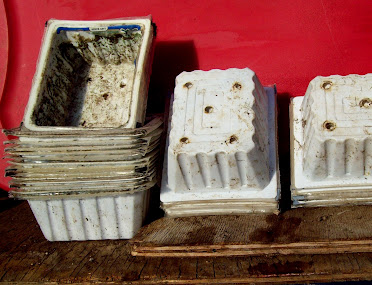
Being vegetarian, we eat a lot of tofu! With holes drilled in the bottom for drainage, they make excellent pots for germinating seeds.
Celery seeds are tiny and it can be a challenge not to sow them too thickly. Ideally you want about 1/4" between each seed. Put some seed in the palm of one hand and take a small pinch of seeds in the other hand. If you hold the seeds about 6" above your pot and drop them slowly, they will tend to spread out evenly as they fall. Use only the thinnest covering of finely sifted soil to lightly cover the seeds (or rinsed sand works too - be sure the sand you use doesn't have salts on it if you collected it yourself). Gently press the surface of the soil so the seeds below have good contact.

A good rule of thumb is to only cover seeds with soil twice as deep as the seed is thick. So, a millimeter-sized seed, would be planted approximately 2 mm's deep. 

They will germinate best with some bottom-heat from a heat mat, or to be kept indoors until the seedlings pop up above ground but as soon as the green leaves appear they need sunlight or a grow-lamp. Keep the soil moist (but don't over water!) by bottom-watering (in a shallow dish) or with a plant-mister as too much water can kill the tiny seedlings.

The seedlings will develop an extensive root-system first which can take many weeks. Don't give up on them! 

Transplanting/optimal soil conditions: Our celery seedlings go through two transplanting processes. First, once the root-system has developed and the plants are about 1/4 - 3/8" tall, we carefully tease them apart and give them each their own pot. Jumbo six-packs work fine. We have also used the tofu containers mentioned above (six to a container). These work well if you'll be able to do the next phase of transplanting as soon as the roots fill the soil. The jumbo six-packs extend this time a little bit as they hold more soil.
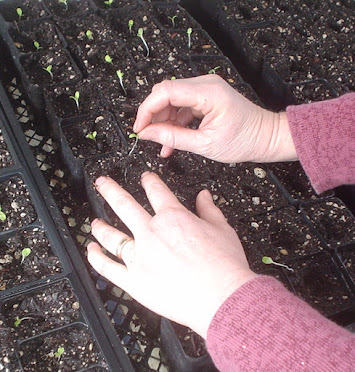
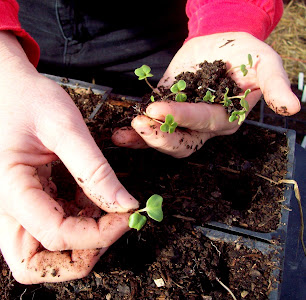
Transplanting tiny seedlings...

Celery is a heavy-feeder and the soil you transplant into should be well-draining and relatively high in nitrogen and minerals.

Allow the seedlings to grow for about two months or till they have a dense root system and healthy greens. (Celery pictured to the left still needs another month or so to grow. The roots are well-developed but they'll do better with more greens.) Our first transplants go into raised beds in our grow-tunnels (greenhouses) but a few weeks later, a second crop can be planted outside. Celery doesn't mind cool weather but it doesn't want a hard freeze, and, though you want to keep its soil moist, celery doesn't like soggy, wet feet (standing water).

Celery naturally grows flat on the ground (like a starfish - if seen from above). To get upright bunches (like you buy from a market) it must either be grown close together in a block, or in collars. In the first few years we grew celery, we used milk cartons and large soy-milk containers to keep the celery growing upright (see pics). The collars blocked the sun from getting to the celery and hence "blanched" it (kept it from getting too dark-green or tough). But we always had problems with slugs which found the collars to be a perfect habitat. For the last several years we've simply grown the celery close-enough together so each plant holds the others up that are around it. Spacing them about 8" apart seems to be the ideal distance. To use this method (without collars), plant them in a block or square (not a single row). They'll grow fine in a single row, they just won't grow upright and may be darker green and a little more fibrous.
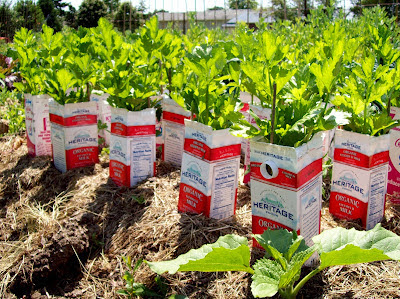
We used to use milk cartons (held in place with bamboo stakes in two corners) to keep celery upright - it tends to flop flat - and to blanch it (direct sun makes celery darker green and more fibrous) but the collars proved to be ideal slug habitat.

Now we plant the celery in "blocks" (not rows), 8" apart, and the plants hold each other upright. They're not quite as blanched as with the collars but it takes less time and we don't have problems with slugs or snails.
Watering
: Celery plants are approximately 95% water so they appreciate consistent, deep watering. In the beginning, after they're first transplanted in the ground, they'll need to be watered more frequently but not as deep. Later, it's better to water less frequently but more deeply which encourages the roots to reach down into the soil and pull up the water and minerals from below. Shallow watering creates a shallow root system which is much less tolerant to fluctuations in air-temperature and soil wetness.

Late winter celery in our greenhouse. This has been harvested once and grown again.
"Cut and come again" - celery beyond the first cutting: If you are careful about harvesting, celery will re-sprout from its roots. We cut just above the point at which all the stalks are still joined to the roots. The stalks will not be joined at the root (like you buy it in the store) but this gives the roots the best chance of re-sprouting. Keep the plant watered after harvesting to assist it in putting on new growth. This cut-and-come-again celery in the raised beds of our greenhouses has frequently survived through the winter, providing flavorful, mineral-rich stalks to harvest the following, early spring. Sometimes this second-growth celery is a bit more fibrous but it's still delicious and the fibers won't be a problem if you chop the celery finely.

Second-cutting of celery is often more coarse but also more flavorful. Chop finely to use in soups. "Mmm, good!"
The leaves of celery are typically removed before the bunches are sold in a market but they are delicious, chopped finely in soup or salads. They can also be dehydrated and used for seasoning for when you don't have access to the fresh plants.

Nutritional content of celery: Celery is high in water and fiber-content and very low in calories. Since celery is mostly made of water (almost 95%), it is not particularly high in any one vitamin or mineral. Nevertheless, celery is a good source of vitamin K, with one cup containing about 30% of the recommended daily intake, according to the University of Michigan. Celery can also help you get enough folate, potassium, fiber and the micronutrient molybdenum. It contains small amounts of vitamin C, vitamin A and some B vitamins. "Celery is naturally low in calories, carbohydrates, fat and cholesterol," (Read full post here: Celery: Health benefits & nutrition facts)
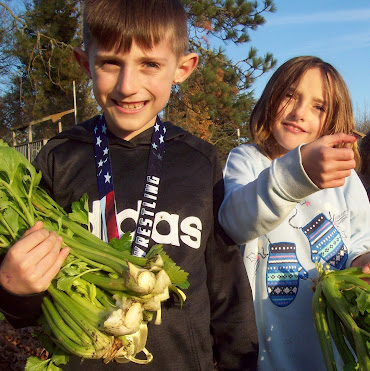
Always grow or buy organically grown celery. Having such a high water-content, it absorbs and retains pesticides and herbicides.
If you're not able to grow your own celery, always buy it organically grown. Because of its high-water content, it absorbs lots of whatever herbicides or pesticides that are used in growing it. It consistently shows up in the "Dirty Dozen" of fruits and veggies you should always buy from an organic source. (For more info, read this post: Which Fruits and Vegetables to Always Buy Organic-LINK)

As people tour our gardens, they commonly remark that they've never grown their own celery. We hope this post has helped demystify the process and we wish you much success with your growing.


And here's some more excellent guidance on growing celery from the National Gardening Association: How to Grow and Care for Celeries

Wednesday, January 1, 2025

Giftivism: Another Name for 'Sharing'

Pavi Mehta: Reclaiming the Priceless

"Giftivism: the practice of radically generous acts that transform the world. History has seen giftivists in all corners - Gandhi, Mother Teresa, Martin Luther King, Nelson Mandela and so forth. People who believed that when we change ourselves, we can fundamentally change the world. But this ability isn't restricted to social change giants. The seeds of giftivism lie in each of us. But to tap into it we have to do something all these people did. We have to upturn one of the core assumptions of economics - the assumption that people always act to maximize self-interest. The assumption that we are inherently selfish beings. Giftivism flips that idea on its head. What practices, systems and designs emerge when we believe people WANT to behave selflessly?" 
In this heart-stirring talk filled with real-life stories, writer Pavi Mehta describes the path of Giftivism and the vast potential it holds for returning us to the priceless.

This video was sent to us because we subscribe to an email service: Daily Good - which sends us examples of positive, hopeful actions taking place worldwide. 
 
Here is the link to the original post with a video of Mehta's speech and a written transcript. Enjoy! Giftivism: Reclaiming the Priceless


Winter at the Sharing Gardens

Our newest greenhouse - the Sunship - Sept. 2016
Hi all - We are re-posting this winter garden update from January of 2017 since it gives a great summary of the kinds of tasks and projects that fill our time at this time of year. Enjoy!

Greetings everyone! Here we are heading into our ninth year with the Sharing Gardens, Can you believe it? From our humble beginnings at Alpine Park, with an 80'x80' garden-plot, an 8'x8' greenhouse, a handful of tools and willing spirits we've grown to the thriving, expanded project we are today.

In the beginning, we didn't even have pictures to use on our website so borrowed photos Chris had taken in previous gardens. LINK to first Post - A Seed is Planted Our readership has steadily grown over the years and is currently experiencing a surge in readership that peaked with over 17,000 site-visits in December 2016 alone! It has tapered off slightly since this peak but we are still averaging 300 visits per day. These visits come from all over the planet both for practical gardening knowledge and for inspiration about the power and joys of generosity.

Home-grown dinner!
This post features info about what happens at the Sharing Gardens during the winter months. Enjoy! From December through about mid-February, activity in the gardens is minimal. Here in the Willamette Valley of Oregon, our winters are typically cold and rainy (with occasional snow and freezing temperatures) and the shorter day-lengths mean that any plants that are still growing in our greenhouses (kale, fava-beans) just maintain their current size, without adding any growth until days get longer.

So, just what DO we do to prepare for the coming Spring?

Because we practice a style of gardening that requires deep mulch, even in our greenhouses, the winter is time for preparing beds. Preparing Garden Beds - One Low-Tech Way-LINK
 
Our largest greenhouse with tomato plants on left, peppers and fig-trees on right. October 2016.
As the season comes to a close, and the last of the summer crops have been harvested, we rake away the left-over straw from the paths of the greenhouses. We remove cages from the tomato and pepper plants, cut them off at ground level and cut them stems up in 6" - 8" pieces and put these pieces in the paths underfoot. The stems are too course to decompose by planting time which is why we don't cut them in the garden beds. Cutting them speeds up decomposition and, by the time plant-roots are reaching out under the greenhouse paths, the stems will be almost entirely broken-down.

The next step is to cover the paths with the straw raked off prior to cutting up the plants. Clear any remaining straw, or plant matter off the greenhouse beds. The garden-beds - where we'll be planting in the spring - are generously sprinkled with coffee-grounds, and a dusting of wood-ashes.

Greenhouse beds covered in 1/2' coffee-grounds and a light dusting of wood-ashes.
We have been experimenting with creating greater soil-fertility using coffee grounds and wood-ashes. Coffee grounds are available for free from most coffee-shops; they're grateful to have someone come pick them up! And though they're not sustainable, they are a free resource at this time. For some reason, red-wiggler worms (also called manure worms) just love coffee! If you spread it liberally on your soil, they will migrate to find it. Their worm poo (castings) provides many nutrients that plants love and the tunnels they make help aerate the soil. Wood ashes should be used sparingly; they are very potent but provide a bounty of minerals to the soil.

Worms love coffee grounds!
Coffee grounds provide generous amounts of phosphorus, potassium, magnesium, and copper. They also release nitrogen into the soil as they degrade. When we have it, we spread it about 1/2" thick. We also layer it into our compost piles. Coffee grounds - Will They perk Up Plants - LINK

Wood Ashes provide all necessary nutrients except nitrogen and sulfur.  We use ashes from our wood-stove (that heats our house). We use only newspaper to start the fires and burn pure wood. We don't burn anything with paint; no ply-wood or other man-made products so the chemicals in them don't get into our food-chain. We sift the ashes to remove any big chunks, nails or screws. Be very careful not to use too much! We put just the lightest dusting in our beds. Do not use wood-ash to make a potting soil. It is caustic to worms and will alkalize your soil so use only a little and wait before planting seeds or seedlings. Do not use around acid-loving plants (like blueberries, or in potato-beds). Article from our local University Extension Service: Wood Ashes Can Benefit Lawn and Garden

Chris adds leaves to the greenhouse-beds - about 6" is ideal.
Next we add a thick layer of leaves, a layer of straw and, if we have it, green-grass clippings and more coffee grounds. Ideally we cover each garden bed with a layer of carpet, or cardboard - to keep in moisture and hasten decomposition, but sometimes we just leave the rows open to the air. All this organic matter is slowly eaten from below by worms and fungi and bacteria. In the spring, these beds will be ready to plant our new crops.

December 2016. Note trellises for winter-peas, a re-purposing project from an old chicken-coop (from left, to center). Light-green carpet covers row in lower-right corner.
Winter is also a time for pruning our fruit trees and blackberry bushes. Pruning helps fruit trees stay healthy and productive. Almost all our fruit trees were mangled by deer in their first year and a half so we still haven't had much fruit from them yet. Most of them have lots of fruit-spurs this winter so we're hoping that 2017 brings more fruit. In a few years' time, our 3-dozen apples, pears and plums should yield enough surplus that we can share the bounty with local food-charities.

 August 2016. Here is our first harvest from an Asian pear we planted in 2014. Not much, but they sure were delicious!
We've been enjoying herbal tea made from rosehips and fennel-seeds we grew and dried. Here are rosehips from rosa rugosa a hedge-rose that grows well in our climate that we started from seed three years ago.
October 2016. In mid-Autumn, we mulched most of our outdoor garden-beds with leaves and straw so they will be ready for planting in the spring. Chris looked under this straw just last week and found many worms! Even though the ground is saturated from winter-rains, the worms thrive at the surface where the straw meets the ground.
January/February is the time to plant biennial, root-crops for seed.
Carrots, beets and onions all produce seed in their second year so you must save them in your refrigerator or a root cellar and re-plant them to grow-out for seed. We plant them in gallon pots in January or February and than transplant them into the ground later in the spring. Seed-harvest occurs through much of the summer-months.

Tomatoes, peppers and squash make a bright compost pile!
We continue to build our compost piles. We don't have as much material to add to them at this time of year as the garden-debris has mostly been collected. The bins we are filling now won't be ready to use in the gardens till summer-time but you can never have too much!

We continue to process food for long-term storage. Llyn likes to make pumpkin-pie filling for freezing. In early January she noticed some of our Provence squash was showing signs of rotting so she had a marathon session and froze ingredients to make 22 pies. Yum! Making Pumpkin Pie from Scratch - Recipe - LINK

Baking Provence squash, a favorite for pie! Yes, it really is that orange, and so sweet!
Winter is also time for indoor-construction projects. Below, is a wood stove that Chris made from a kit that comes with legs, a collar and door for the stove. Holes must be cut out of the barrel using a metal-cutting saw. We purchased a used barrel from a food warehouse and Chris discovered that the barrel we bought for $4 had almost a gallon of honey still in the bottom which he drained and we enjoy on our toast!

 Here's a wood stove that Chris made from a kit.
Cleaning and lubricating hose-fittings, valves and timers so they'll be ready to use in the spring.

Each summer we dedicate a sizable amount of garden space to crops that store well: winter squash, potatoes, beets, carrots and storage onions to name a few. We want to be able to augment the Food Pantry's fresh produce offerings for as long as possible when their donations from other local sources begin to diminish. To be honest though, by the time all our share-givers receive their share of winter crops, the only thing we really have surplus for the Food Pantry is winter squash. Perhaps in future years we'll be able to increase our output, or other local gardens will join us in the project and dedicate a row of their space to storage crops to share.

Last week we delivered the last of our winter-squash and hot-peppers that we had saved to share with the Food Pantry. Because we plant our peppers and tomatoes in greenhouses, we can harvest them after everything outside is drooping and dying from heavy Autumn rains. We do have to harvest them before the first hard-freeze or they'll rot on the plant, even in the greenhouses. Our last harvest this year was December 6th!

The last of summer-harvest! Dec. 2016.
We are so grateful that the winter solstice has passed and that days are getting longer! In another six weeks (mid-February) it will be time to start seeds again for cool-weather crops (onions, cabbage, broccoli, lettuce, to name a few). Still plenty of time to finish our pruning, paint some more signs, clean and organize our garden-sheds and workshop and perform other maintenance tasks.

August 2016. Can't wait for next year's tomatoes!
The Sharing Gardens project is a unique model of community garden that is 100% non-commercial, uses local materials for soil-fertility, provides thousands of pounds of free produce to local food-charities and encourages gardening as a way to increase wildlife habitat. 

Monday, November 4, 2024

Free woodchips for our town!

We are so grateful to M.R. Tree for delivering wood-chips to the parking lot we share with Heritage Hall for the free use of anyone in the Monroe area. (The Sharing Gardens - 664 Orchard St.)

Here are a few guidelines to make this work for the whole community:

-Take from the front of the pile (closest to Orchard St.). Then, when the Tree-people drop off more, there's room at the front for them to drop their load.
- Share with your neighbors. If you take a large load, wait a few days before coming for another load so that people who have busy schedules have a chance to get some too. If the pile doesn't get any smaller after a week, feel free to come back for more.

Sticks: If there are un-chipped sticks in the pile and you don't wish to take them, please make a neat pile to one side or the other that will make it easy for us to dispose of them. 

Thank you for your cooperation. With your help we can make this program sustainable for the community to enjoy for a long time.

Though our initial purpose for forming the Sharing Gardens was to provide free fruits and vegetables to food charities, we've always wanted our project to be helpful and relevant to other folks in our community who don't shop at the Food Pantry. In the last few years, we found a way.

A free wood-chip pick-up and drop-off site!

We share a large parking lot with the S. Benton Food Pantry which provides easy access both for the chip-trucks and neighbors with trailers to turn around in.

The Sharing Gardens shares a large parking lot with the Community Center/Food Pantry next door.

This program has benefits for everyone involved:
it saves the tree companies the time to drive an extra 25 miles to the closest municipal-scale composting facility, and the money they charge for yard-waste deposits ($70/load!). And our neighbors have a reliable source of free wood-chips at an easily accessible site.

Tree companies are able to easily drop off a load of wood chips and our neighbors also can get close for loading.

Sandra and Jenny help Jim load wood chips onto his trailer.
We hope the program can continue indefinitely!